On a side note, I never thought of building terrain as a "Green" hobby, but we'll also look at recycling in today's post. We'll give you several recommended measurements and such, but remember, nothing has to be "exactly" as we state. Variations are OK, don't get hung up on cutting your pieces to an "exact" measurement. Remember, above all, this is supposed to be FUN!!
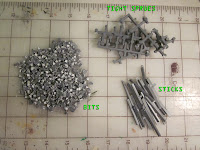
To start you'l need some old sprues, a few pieces of board (hard board or gator foam will work) and the wire from an old spiral bound notebook or two.
If you wanted to do a similar project for Warhammer or other historical war games, get some sticks for logs, model wagon wheels, wooden crates or barrels and craft sticks. We can show you this at a later date.
Now onto the project at hand. The main tools used were the utility knife and this pair of heavy duty clippers we found at Harbor Freight Tools for 2.99.
Set aside your "bits" and we'll focus on the larger sticks first. For our bits we recycled an old vitamin container with a flip top lid and stored them all inside.
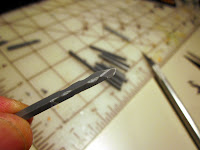
Now take your posts and a utility or hobby knife and take small chunks out of the corners and slice off the end from at least 2 different angles to form a point. There's no wrong way to do this, just as long as you like it. Set those aside with your bits.
Next use your tightly packed sprues and chop them up the same way you did the longer pieces. You'll wind up with something close to this.
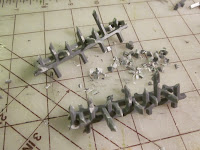
Take the pieces you just finished and see if they fit together at 90 degree angles from each other. You may need to trim a point or two in order to get them snug. They should be at 45 degree angles from the ground. Any leftover shavings and scraps can be added to the bits you cut earlier.
Bases. For our barricades, we trimmed some gator board (harder surface than foamcore) pieces to make our bases. The first one is approx 6 inches long by 1 inch wide (150mm x 25mm). The other two are 4 inches long by 1.5 inches wide (100mm x 38mm).
With a hobby or utility knife, cut roughly around the base at an approximate 45 degree angle. Round off your corners too. If you want several barricaeds to fit together, you may want to cut the corners off at 45 degree angles so when they are placed on your battleground you can fit the corners together nicely.
Back to our short barricades, we took the spiral from an old notebook and twisted it around the crossed pieces of sprue. This helps hold things together and represents barbed wire. We then hot glued them in place on our bases. While the glue is still hot, press in some of your bits we made earlier.
The last step in constructing our heavier barricades is to add finishing touches. If you have any scale tires or 50 gallon drums to add or in our case, we used some craft glue in spots and just added more sprue bits and coarse ballast.
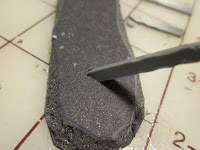
Now back to those longer individual spikes you created. Take your long base and where you want to stick in the spike, cut two parallel lines. These should be far enough apart to fit a sprue in between. Then cut one perpendicular line connecting the other two at one end, like so. If that was confusing, it should be a "U" shaped cut.
At a good angle, stick your "spike" into the hole like so.
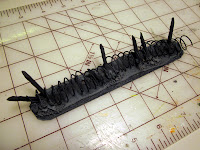
Do this for as many as you'd like. We crossed a couple and used various lengths and angles. If these are Imperial Guard or Space Marine barricades, you might want them more symmetrical. If they are Ork fortifications, the more random the better!
Once again we took a notebook spiral, wound it between our posts and hot glued everything together.
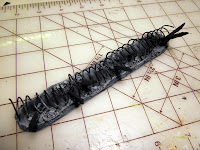
As with the shorter barricades, we added spots of craft glue, stuck in sprue bits and then sprinkled coarse ballast over the rest. We used another recycled flip top vitamin bottle to make it easy to spread the ballast onto the glue. Also, do this over a clean piece of paper of newsprint. When you are done shake off the excess and pour it back into your bottle.
Painting! To start off we sprayed the entire barricade black and used a dark gray dry-brush as the first step.
Then we used a medium gray and light gray
and finally a light dry-brush of an off white for highlights.
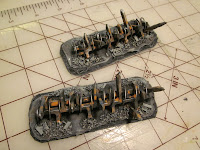
Here is one of the smaller barricades with the same technique applied.
 For the beams and wire, we use gunmetal gray and a highlight of aluminium.
Here's the other barricade with the metal painted.
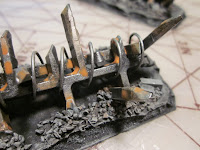
The last step is to add weathering. Metal doesn't take kindly to the elements. Take a red oxide or other rust color and mix it with water to your liking, less water for darker rust or more water for lighter rust. Using a larger bristled brush spread it over your beams allowing it to flow into the crevices and down to the base.
Here you can see it puddling, which is fine.
We also like to add puddles at the bases of the beams or where the wire lays on the surface. Anywhere water would tend to puddle up would be where the rust would get the heaviest.
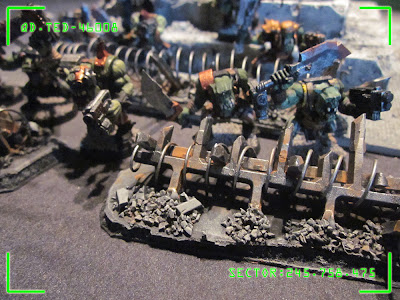
And there you have it, finished Warhammer 40k barricades. With slight modifications, they could be used for WWI or WWII battles or as is for other sci-fi action games like Infinity or Mercs.
Lastly, as mentioned in the beginning of this post, we wanted to talk about recycling. We had some younger hobby enthusiasts visiting recently and were showing them how to build some terrain pieces. One of them, who had been using his noodle, inquisitively asked, "So we're using things people normally throw away?". We happily replied to the affirmative.
Not much was purchased to make these last two projects. Paint, glue sticks and the action figure (which could have been pulled out of the trash somewhere) were all we bought. The foam and boards were all scraps from other things. The lid for the statue base, sprue pieces, notebook spirals and vitamin containers were all recycled. So you could say that this is a "Green" hobby if you wanted to!
Anyway you look at it, it's fun!
Have a Great Battle!
The Old Crow
Anyway you look at it, it's fun!
Have a Great Battle!
The Old Crow













Looks great, keep it up.
ReplyDeleteRobert
www.dungeonlair.com