Monday, March 24, 2014

The Hobbit, The Desolation of Smaug New Miniatures from GamesWorkshop


GamesWorkhop is releasing a new crop of Citadel Finecast figures for The Hobbit The Desolation of Smaug. As of this post they are available for pre-order. You can get them from your local retailer or directly from the GameWorkshop site.

First up is a new Beorn figure included in a set with his Bear form. The kit has 7 components with which to make Beorn the man and Beor the Bear.

Beorn makes his home on the outskirts of Mirkwood. He is a skin-changer, a man with the ability to change his form into that of a bear. In the struggle against evil, Beorn is a mighty force for good.

Thranduil the Elvenking is always vigilant and understandably suspicious when strangers pass into his domain.

A dark power is gathering strength in Dol Guldur and as the ruler of Mirkwood Thranduil and his elves are on their guard.

Captains of Gundabad are the most sturdy and ruthless Orcs in the Misty Mountains. They are the warriors the greatest Orc warlords surround themselves with.

Gundabad Orc Swordsman are regimented and trained to a high standard. This makers them bloody-minded and powerful fighters.

Or if you prefer brutal soldiers whose reserves of strength and resilience are without limit... 
the Gundabad Orc Spearman are for you. These hated foes of the Dwarves have spent many years and lives waging war against them.

Both of the Citadel Finecast kits contain 6 components with which to make 3 Gundabad Orc Swordsman or 3 Gundabad Orc Spearman.

And last but not least is Girion, Lord of Dale. Girion is a mighty king, much beloved by his people. He is determined to defend Dale at all costs from the coming of Smaug the Terrible.

Speaking of costs, the Gundabad Orc sets will run you 25 USD and 15 for the Orc Captain. Thranduil and Girion will shave 20 USD out of your wallet and the Beorn and Bear set will retail for 50 USD.

Have a Great Battle,
The Old Crow

Tuesday, March 18, 2014

Model Building 101 Class Progress

Just a quick post on the Model Building Class we're hosting.

The class is doing great! Everybody has been enjoying it, unless they're not being honest with me.

Here's some of the progress they've been making...

Jake has been quite ambitious and has moved from the half-timber house to a battle diorama. Here he's starting to sculpt the hills.

Russ has his house primed and is starting the painting phase while Nate has the final touches to apply to his house.


Most of the class going at it...

Julie and Landon have finished their paint work and are starting the bases

Julie has gone crazy on her house as you can see from the first image and this one. She cut each shingle , textured them and applied them individually. Her painting is awesome too! Check out the stained glass windows!

Next we'll post the step by step painting guide for the half timber house.

Till then, Have a Great Battle,
The Old Crow

Tuesday, March 11, 2014

How To Build a Half Timber House - Part Two, The Details

Last post was showing How To Build the basic structure of a Half Timber House. This time we'll get into the details of creating the timbers, stonework, doorways and chimneys.

The timbers are made from wooden coffee stirrers but can easily made from craft sticks or balsa wood. When cutting the timber that goes across the front, leave a thickness of the wood stick you are using as an overlap. This will help hide the seam.

The vertical beams were cut to fit up under the roof. precision is not required, the roof will hide any discrepancies. We just held the stick in place, marked the bottom with a pencil and then used our clippers to cut them to size.

We are using four vertical beams on this structure and adding windows between them. A wider house or one with thinner beams will have more.

Here we have six verticals (four to add) and will have a pair of windows between the supports to be glued in place.

Look for sticks with "character" to them. These variations will look great once painted and dry-brushed. Windows are merely thinner cross beams. You can cut them out in later stages, paint them black for openings or paint leaded glass or for the ambitious, stained glass.

Our upper windows only have a bottom cross beam. The roof would hide the upper beam. Additional thinner verticals will go from the cross beams up to the roof. Splitting it will give us smaller windows.

We also added balsa wood support beams on this house.

Add angled beams for a varied look to your walls.

For creating shingles, we used half inch wide strips of card stock. This was a cracker box but cereal or other packaging works well. Try to avoid anything with a glossy finish. The glue has a hard time holding the finish.

Once the strips are cut, mark off cut lines that will represent the individual shingles. Cut half to three quarters of the way up. Vary your cut angles and trim bits off to add individuality to the shingles.

Glue the first one onto the bottom of the roof. Be sure to leave a bit of an overhang.

Glue the next row half on the roof and half on the previous shingle. Try to keep the seams at opposing intervals.

Then continue up till you reach the peak. Each row overlapping the previous.

You can work around things like dormers and chimneys or just run all your shingles and then add them on top of them.

Here is a fully shingled roof. For those wanting additional levels of reality, try cutting individual tiles. It will take a bit longer but will really look nice.

Chimneys can be on the side of the roof like this one. We used a small piece of foam and drew the stone pattern with a fairly dull pencil. Remember the thickness of the stones as they wrap around the corner. We glued ours on before shingles were applied.

Another option is the peak chimney. Again it was made from foam and the stones drawn on with a pencil. This one was added after shingles. No one way is the correct one. Whatever works best for you and your model.

For stone walls, the same technique can be used. Press with a pencil into the foamcore to cause indentations. Here is one of our side walls with the stone drawn on.

Here's another example. Notice the light differences in the crevices or indentations. This will again look great in the painting phase.

A second way to create the illusion of stone is to add it onto the surface. We cut rectangles approximately a half inch by three quarters and smaller ones a half inch by three eights. You can leave the squares for formed bricks or round the corners for cut stones.

We glued the large ones across the base of this tower and used the narrow ones as the opposite corner. This represents the thickness of the stone.

Work your way up the wall or tower filling in as much or little as you like. You can mix in indented stones too. As mentioned before, the painting of the stones will bring it all together.

For your doors and windows, we mentioned just painting your foam black, but cutting the openings give dimension. Leaving an opening is one option. Here on this small guard hut, we framed the opening with timbers.

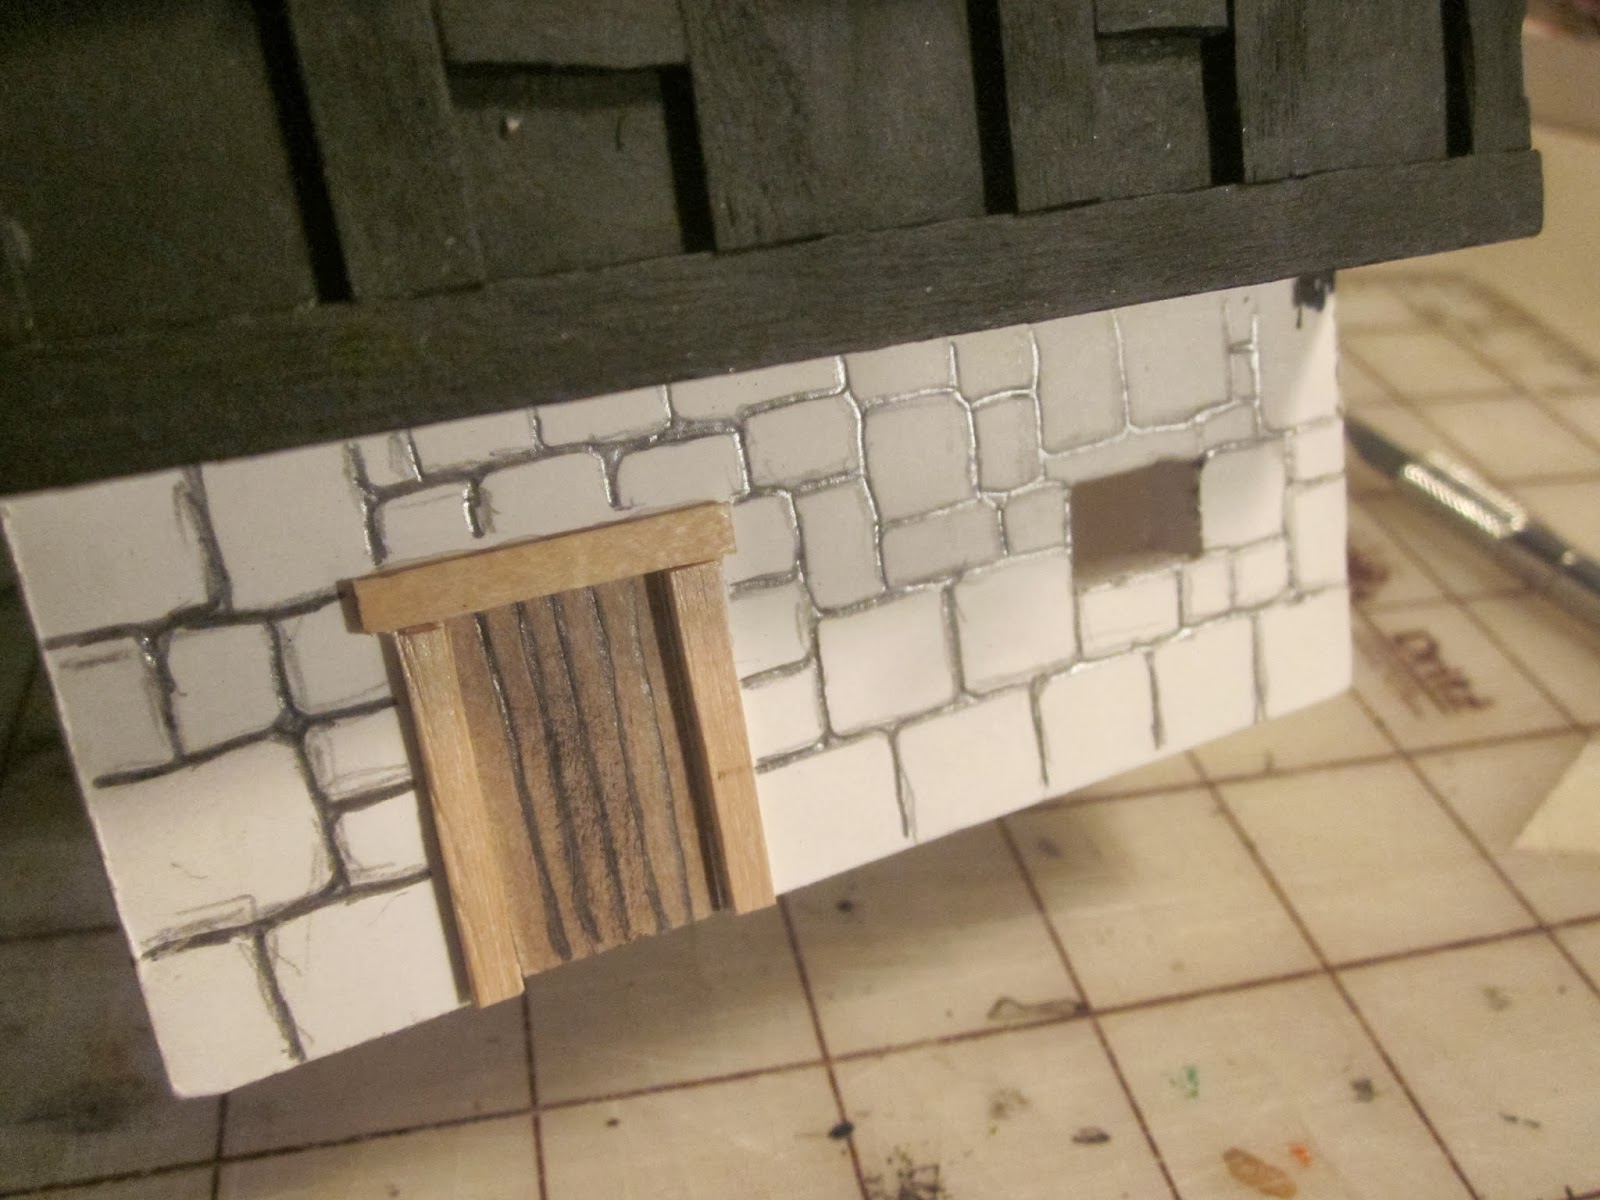
On this house we cut an opening in the stone but wanted to add a wooden door.

We pressed a stick into the opening so the door will be behind the exterior wall. The little recess will add to the overall appearance once the door is in place.

**Does anybody else hate when Blogger rotates your image even though you don't want it to!**

For the door planks we cut various thicknesses and used the piece of foamcore we cut out as a template. We will glue the wood pieces on the foam but allow them to overhang.

Here is the final glued door from the back. You can see the amount of overhang.

To finish it we applied glue into the recessed area of the foam and slid the door in place.

On this door we added the timbers and then glued a piece of card stock into our wood frame. The window to the right has been cut out and a wooden lentil will be added across the top.

Here is a parting shot of the finished half timer house. Next post we'll go over the painting steps.

Have a Great Battle
The Old Crow


Tuesday, March 4, 2014

How To Build a Half Timber House for Warhammer or Black Powder Wargames

Build a Half Timber House
This tutorial will demonstrate a quick way to build a versatile half timber house for medieval and dark age games like Field of Glory and Hail Caesar, fantasy games like Warhammer or In Her Majesty's Name, Horse and Musket games like Black Powder or even WWI and WWII games like Bolt Action.

The half timber house is very adaptable for gaming and can be as simple or complex as you want to make it. This is a great basis for a sturdy house that can be easily expanded on. For this "How To" we'll go over the building of the main structure and go into extra details and finishing in future posts.

Build a Half Timber House
Our pieces are all cut out of foamcore but you could use cardboard or chipboard if you preferred. Our tools for this project were a metal straight edge, hobby knife, pencil and cutting surface. We have two side walls with the stepped out second story and steep peak for the roof. Some people will add a slight curve to the roof, but we chose not to keep it straight. There are two short front walls for the lower and upper levels, a large back wall and our roof which is cut from a heavy file folder.

Build a Half Timber House
For strong and clean corners measure the thickness of the foam on the back of the two front wall pieces and the back wall. The easiest way is to stand your wall on it's side, lay another along the back and draw a quick line.

Build a Half Timber House
Here we have all three pieces measured.

Build a Half Timber House
Next using your straight edge, cut down through the top layer and foam but not through the backing. Then carefully insert the hobby knife in horizontally along the backing and cut through to the foam part to the thickness of your previous cut.

Build a Half Timber House
You should be able to remove a nice square piece of foam. If you did not get the cut right, don't worry. Practice makes perfect. If you cut through the paper backing, later steps with glue will fill anything in.

Build a Half Timber House
If you have extra foam on the backing, lay your knife along it and scrape away the excess.

Build a Half Timber House
To put the building together, add glue onto the inside cut edges of your wall.

Build a Half Timber House
We did the back first, allowed some dry time and then glued the two front pieces at the same time.


Build a Half Timber House
Keep you building square as it dries.

Build a Half Timber House
For the roof, cut a rectangle from a sheet of card-stock or chipboard. Cracker and cereal boxes work great too. Measure the halfway point, mark a line across and with your straight edge on the line use the back of your hobby knife to scribe a line.

Build a Half Timber House
This will allow you to easily bend the roof and keep a neat clean peak.

Build a Half Timber House
Attach the roof by adding glue to the two side peaked wall tops and press it on. If you use just the right amount of glue it'll stay put as it dries. If it's to wet add some weight on the roof to hold it in place till the glue dries.

There you have the basic structure! Next we'll go over the timbers,roof and doors.

Have a Great Battle!
The Old Crow