Wednesday, March 6, 2013

How To Build Life Size Ruins, Practical Modelling Take Two

How to build life size building ruinsWe're taking a siege break but will be back with at least two additional posts so stay tuned!

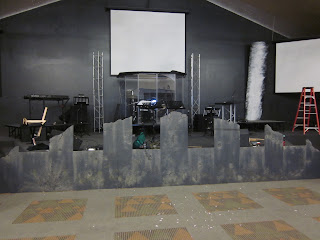
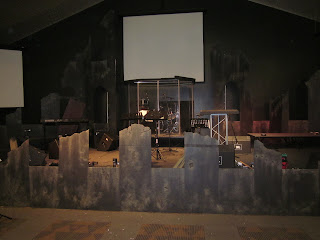
Now, one of most popular blog posts has been How to Build Warhammer 40k Building Ruins. It was liked so much by someone who saw the "Practical Modelling" post we were asked to super size it for a stage backdrop. Here you see it in action, now we'll show you how to build your very own!

How to build life size building ruins
Start with 4 x 8 foot sheets of polystyrene insulation board. We'd recommend at least 1" thickness or greater for the vertical boards. The thinner boards are not as rigid and will bend.

How to build life size building ruins
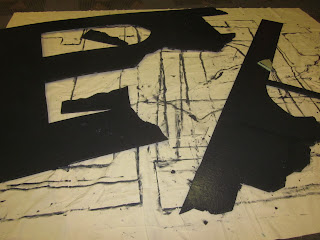
We used 10 of the boards on the entire set. Above is the left side and here is the right, placed in the pattern to be cut. You can see approximate placement of the door and windows.

How to build life size building ruins for stage
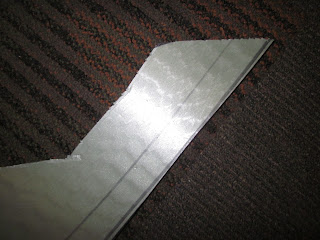
The front of the stage will use three more boards. Here the left side has been cut out using a utility knife.

How to build life size building ruins for stage
And the right side is cut to the pattern.

How to build life size building ruins for stage
Don't worry to much about straight lines, you'll never notice once everything is installed and weathered.

How to add texture to life size building ruins for stage
Here you see the same piece weathered by beating on it with implements of destruction! Also the edges were broken off for a rougher appearance. You can do this with a knife, saw blade or your fingers.

How to add texture to life size building ruins for stage
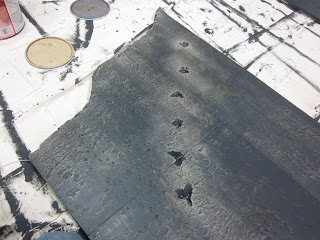
We gouged out bullet holes with the utility knife by sticking it in at a 45 degree angle and spinning it around.

How to build life size building ruins for stage
To hold the pieces together we back the seams with spare chunks of foam and use coarse thread screws.

How to build life size building ruins for stage
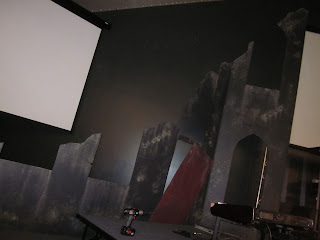
Now to test the size and design in place before painting starts. All worked out well...

How to build life size building ruins for stage
now the right side (sorry for the blurry image).

How to build life size building ruins for stage
Here is one of the foreground pieces being weathered with blast marks.

How to paint life size building ruins for stage
When painting, use drop cloths or a surface you don't mind getting paint on! This will get messy.

Everything was coated with a dark grey to start.

How to paint life size building ruins for stage
A dark brown was added to simulate dirt, mud and debris flying around during the explosions.

How to paint life size building ruins for stage
Finally the light grey was dry-brushed on to make the details (like cracks and bullet holes) and edges stand out.

How to paint life size building ruins for stage
Here all 24 feet of the three foreground boards are being installed.

How to paint life size building ruins for stage
This is the right side after all the dry-brushing was finished.

How to paint life size building ruins for stage
And here's the left ready to go. A brace was placed across the doorway opening to support the board when being moved. it'll be removed later.

How to paint life size building ruins for stage
The finishing touches being applied after installation.

How to build life size building ruins for stage design
Right side adjustments being made

How to build life size building ruins for stage design
Left side is in. It is 16 feet tall and 16 feet across at the bottom.

How to build life size building ruins for stage design
And there it is, ready for action.

How to build life size building ruins for stage design
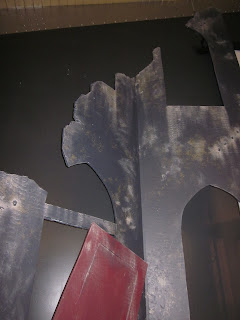
Here's a nice shot of the left side peak.

How to build life size building ruins for stage design
Now add some fantastic apocalyptic lighting and you're ready to go. If you want to see it in person and are in the Pittsburgh Pa area, drop us a note or leave a comment.

How to build life size building ruins for stage design
Final lighting was worked out for maximum affect.

How to build life size building ruins for stage design
We hope you like it as much as we enjoyed building it. The whole project took two days to build and install.

How to build life size building ruins for stage design
Enough for now,

Have a Great Battle,
The Old Crow

How to build life size building ruins for stage design

Sunday, February 24, 2013

Warhammer Goblin Spider Riders How to for your Siege Campaign


How to Paint Warhammer Goblin Spider Riders
Continuing the Warhammer siege theme in our posts, nothing gets you over the walls like a batch of Goblin Spider Riders! We like deals as much as anybody and are always looking for ways to save you money on projects. You can use the Folk Art and Apple Barrel Colors paints by Plaid and Americana paints by DecoArt instead of the more expensive paints. They typically cost 1.59 - 2.49 depending on color and can be bought at your local craft store.

How to Paint Goblin Spider Riders step one
We tried a couple color schemes and decided on a brown and green assuming they would blend into the forest. The riders were assembled and primed with black. We started with burnt umber on their bodies and upper legs.

How to Paint Goblin Spider Riders step two
Second we added avocado onto the front and upper legs and also on the back of the spiders abdomen.

How to Paint Goblin Spider Riders step two
If you are painting some of these guys don't worry to much about the underside of the legs and body, you'll rarely see them

How to Paint Goblin Spider Riders step three
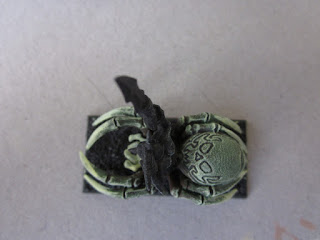
Next we used light leaf green on the tips of the legs. We also dry brushed the upper legs, face and mandibles to highlight those areas.

How to Paint Goblin Spider Riders step three
Lightly brush it across the abdomen to catch all the edges and bumps.

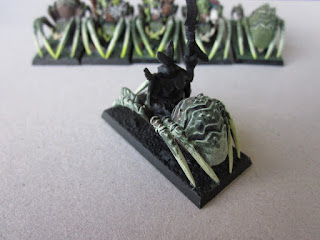
There are two body styles for the spiders. The bumpy one here at the left and...

How to Paint Goblin Spider Riders step three
one with a recessed skull pattern.

Here we've dry brushed the light leaf green over the avocado to really expose the pattern. With the black primer still in the recesses it shows up very well.

How to Paint Goblin Spider Riders step four
The last green we used is kiwi which really radiates nicely. We used it on the tips of the legs, eyes and mandibles.

How to Paint Goblin Spider Riders step four
We started the rider with a base of olive green and then a Folk Art color, Hauser Green Light.

How to Paint Goblin Spider Riders
We based his cloth, straps and shield with burnt umber and highlighted with either raw umber or nutmeg. Pick corresponding colors for the feathers they all wear. Here is a finished rider. This guy is the standard bearer for the "Nasty Nippers"

How to Paint Goblin Spider Riders
His spider has the skull pattern on the mandible and we did some craziness on it for decoration.

Goblin Spider Riders for Warhammer Siege
The story we invented for these guys is they raided the Rowdy Red tribe and knocked off their leader. They used his former spider as their banner to indicate the great triumph! Four layers of red were used to get the final result.

Goblin Spider Riders for Warhammer Siege
The bases are modeled with great texture and little extras like rocks, tree trunks, webs and little spiders! Use a simple drybrush to bring out the features and then add touches of color to the details. Here is the leader of the Nasty Nippers, Yarvit.

Goblin Spider Riders for Warhammer Siege
Goblin Spider Riders have the "Wall Crawler" and "Creeping Assault" special rules meaning they can go right over castle walls and the rider and mount can both attack. This gives the Goblin riders an increase in their armor save for being mounted.

Goblin Spider Riders for Warhammer Siege
So get those spiders crawling and
Have a Great Battle
The old crow

Sunday, February 17, 2013

Warhammer Siege Log Battering Ram


How to Build a Warhammer Log Battering Ram
Sorry for the lapse in our Siege Warfare articles. You have your siege tower, now lets continue with a log battering ram for extra muscle to bash in a  few castle doors!  Nothing like a good battering ram to do the job. This one will be for a Warhmmer Orcs and Goblins Army so historical accuracy won't matter. We'll give it an iron head to batter wooden doors even faster.


How to Build a Warhammer Log Battering Ram
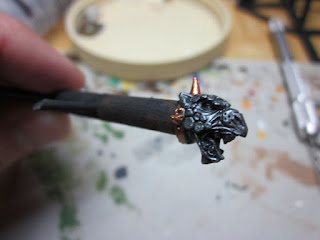
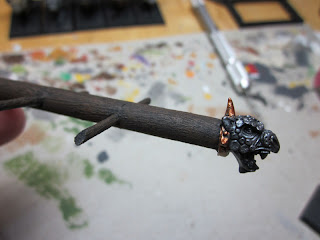
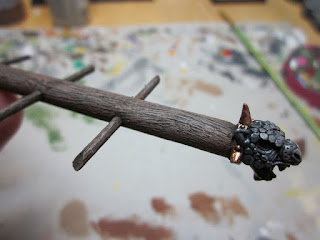
I had found a spare GamesWorkshop hound head in my bits box. Could have been a chaos hound, something from Necromunda or even GorkaMorka. Anyway it looked mean enough to take on some heavily barred doors! We took a 1/4" dowel cut to 4" in length, drilled three holes down the side and inserted round toothpicks. After they are glued in place, clip off the pointed ends. We attached the metal ram head before undercoating it.

How to Build a Warhammer Log Battering Ram
Undercoat with black spray primer or give it a good base coat wash of black liquid acrylic.

How to Build a Warhammer Log Battering Ram
The steel head was base coated with metallic gunmetal gray and dry brushed with metallic aluminium.

How to Build a Warhammer Log Battering Ram
The "collar" on the ram head was detailed with Pure Bronze for a nice warm contrast to the head.

How to Build a Warhammer Log Battering Ram
The log consisted of overlapping layers of browns dry brushed from dark to light.

How to Build a Warhammer Log Battering Ram
The colors used were Burnt Umber, Coffee Bean, Territorial Beige and a final highlight of Mushroom

How to Build a Warhammer Log Battering Ram
And here you see it is in action! Orcs bearing the Yellow Hand of Sourdough are using the ram to its fullest potential, attempting to take down the gate of a castle.

Enjoy!