Showing posts with label Steampunk. Show all posts

Sunday, July 12, 2015

IHMN Civilians, Wagons, Company Characters and Rugs

Always looking out for additional In Her Majesty's Name resources, we stumbled upon Blue Moon Manufacturing. Blue Moon was established in 2007 and have developed a range of figures sculpted by Bob Naismith, covering many genre.

If you are looking for Company leaders and their supporting cast, stop in at their Pulp Character Section you can find Captain Josiah and his Crew with Firearms (as seen above). There are 4 figures in this set and only cost $12.50.

Also check out their Egyptian, Japanese and Russian Agents. There are 5 figures per pack and only cost $14.00 each. Pictured here are the Russian agents.

For towns folk and civilians to add color to your tabletop game, check their Things That Go Bump In The Night section.

For 41.00 you can get 20 figures in each of the Romanian Civilians and London Victorian Civilians box sets.

For additional table details to add flair to your game, the Wagons Ho Section contains the Doctors Wagon This is a resin and white metal kit, some assembly required.

And the Mail Wagon. Each of these carts comes with 2 horses and will run you $26.00 apiece.

Lastly, if you like to go for interiors, print out these awesome oriental rugs, cut and place inside your buildings!


Saturday, February 21, 2015

What Have We Been Doing: Steampunk Gameroom


Way back in November we showed a wargame table restoration and mentioned needing a room to put it in. So here it is, our Steampunk Gameroom! This is one of the reasons we haven't had any posts the last few months. Took a bit of time to get this done.


Lot's of places for wargaming accents...

Plenty of space to add lots of reference books about armies....

And the best thing of all is the wargaming table! If you want to see the step by step renovation, check out the post on the Hendersonworks blog

Have a Great Battle,
The Old Crow

Friday, September 26, 2014

28mm Steampunk Buildings for In Her Majesty's Name

Novus Design Studio is an online only retail business that makes quality resin buildings and accessories, including a couple Steampunk buildings.

Novus Design Studio: Steampunk Victorian House
Their heavy gear Victorian house has a metal roof, brick construction, riveted front door, windows with metal shutters and strategically placed gear clusters.

Novus Design Studio: Steampunk Victorian House
The model features 2 lift off roofs and a detailed interior ideal for your troops.  

Novus Design Studio: Steampunk Victorian House
This groovy steampunk house measures: 4.5"W x 6.25"L x 5.5"T  (114mm x 159mm x 140mm) and will only cost 36.00 USD

Novus Design Studio: Steampunk Victorian House
Novus Studio's  Steampunk Factory features brick construction augmented by such notable details as gears, sprocket clusters, rivets and metal roof panels.

Novus Design Studio: Steampunk Factory
A set of heavy metal doors and a lift off roof completes the factory details. Anyone in need of a repair facility for their machines need look no further!

Novus Design Studio: Steampunk Factory
The factory measures: 6"W x 7"L x 5"T  (152mm x 178mm x 127mm) and also costs 36.00.

Novus Design Studio: Steampunk Factory
Their initial product selection features 15mm urban ruins, 15mm Normandy/European ruins, 15mm bridge, fountain and wall sets, 28mm Steampunk buildings, Fantasy bridge and wall sets, and a small selection of 6mm structures.

Have a Great Battle
The Old Crow

Monday, June 30, 2014

New Release - Armorcast Victorian Streetlights, Perfect for IHMN

We're always looking for new things to add to our miniature battleground and recently found these swell Victorian Streetlights. They are produced by Armorcast Battlefield Scenery right here in the USA. If you are enjoying all the expansions to In Her Majesty's Name, you might want to pick up a couple of these.

The straight neck lamposts run 6.00 USD per pack of three and the curved neck run 7.50 USD.

Located in Cleveland Ohio, Armorcast LLC has re-released all of the classic Armorcast Terraform Battlefield Scenery lines, and is producing new terrain for Fantasy, Historical, Steam Punk, Modern and Sci-fi genres.

There's something for everybody there!!

Have a Great Battle
The Old Crow

Monday, December 2, 2013

How To: Build an Artillery Emplacement - Part Two

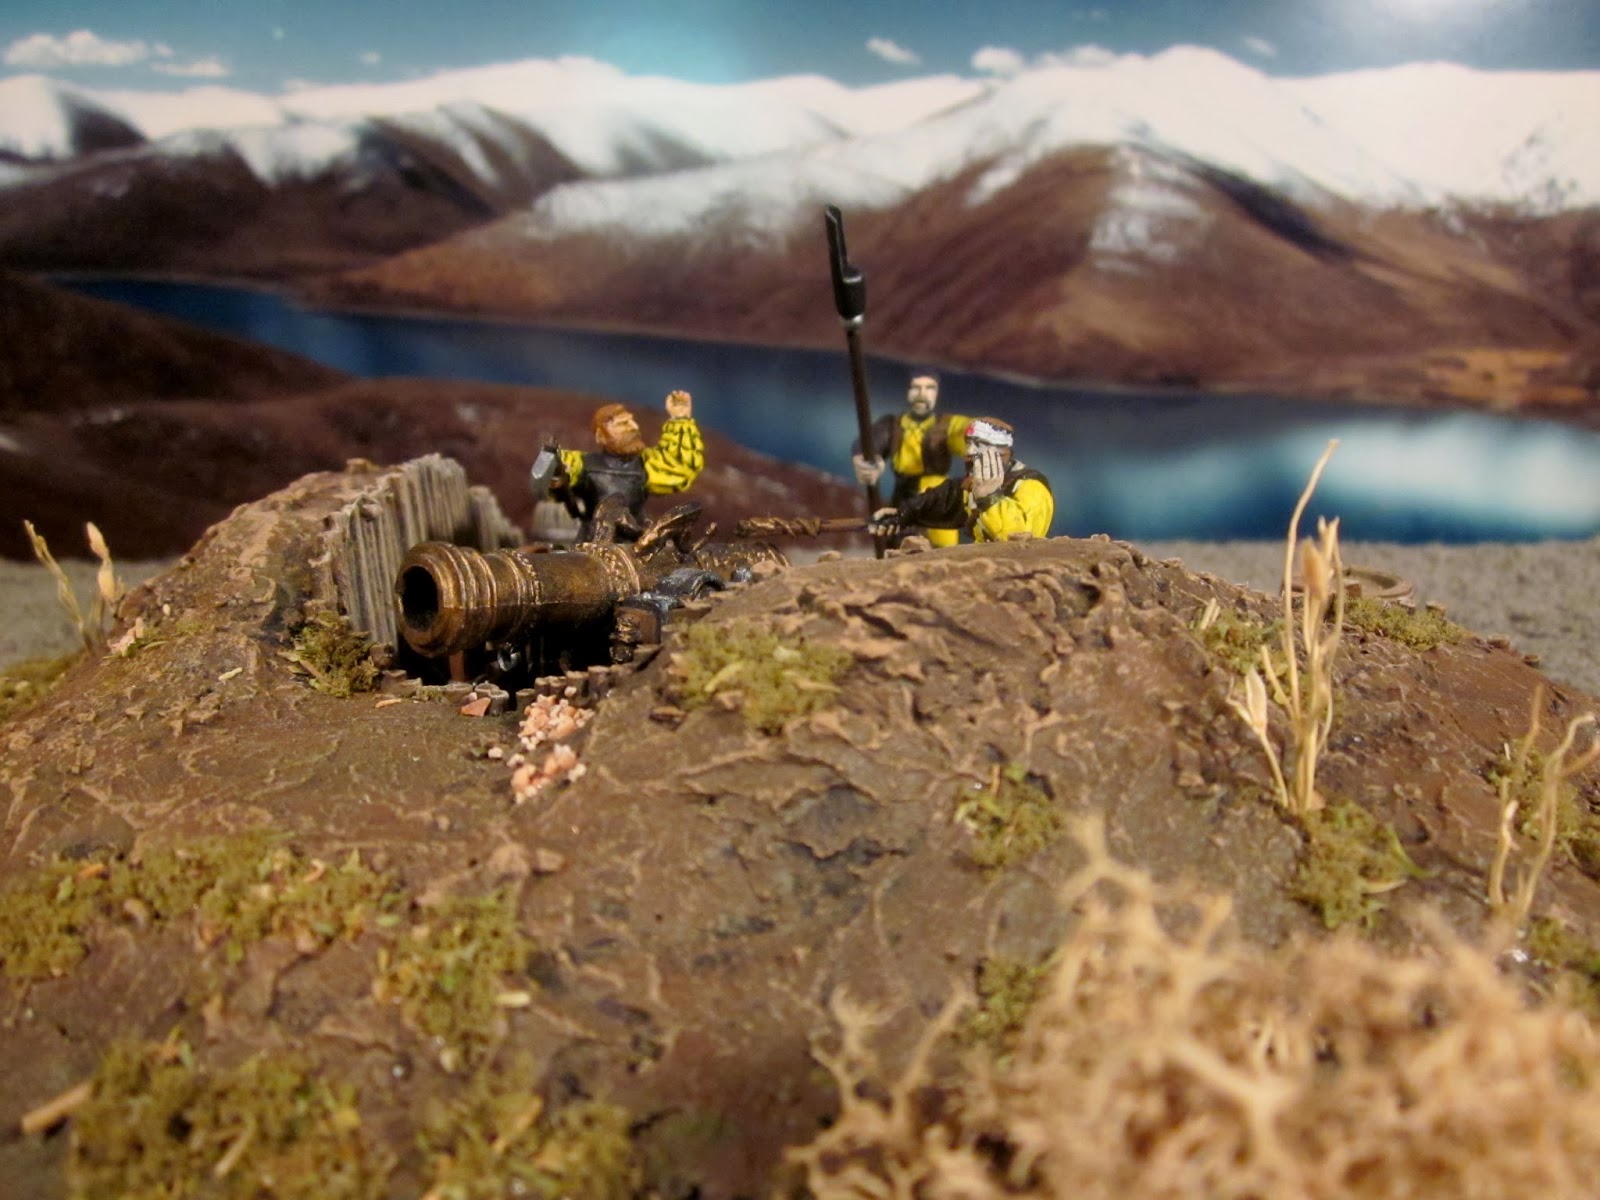
Last post we started to build our artillery emplacement and in part two we'll show you how to paint and finish it! Here's the final project with our dwarf canon.

In Part One we assembled the emplacement and had it primed in black. Next we added a basecoat of muddy green

Then a coat of Burnt Umber and a lighter coat of Coffee Bean.

Next we added touches of English Ivy in the lower portions outside the emplacement.

Finally a dry-brush of Territorial Beige to bring out the details and add highlights to the emplacement.


The dry-brush really makes the ruts stand out.

The wooden interior walls were given a light coat of Barn Wood to differentiate them from the dirt interior.

Now for some weeds and foliage. We have a straw broom which we pull out a few pieces and trim them for our fall weeds.

Use a pin drill to add a few holes. Gathering a group of the trimmed strands, add some glue into the hole and insert several of the strands. Make sure the strands vary in height for a natural appearance.

Now for leafy ground cover, we placed spots of glue into several recesses and lower areas. Then we took a mixture of flocking, ballast and seasoning and sprinkled it onto the areas of glue.

We also found some fall colored flocking to add to our mixture.

Once the mixture is on, press it into the glue and then shake off the extra to be put back into your container.

For a final touches we added a few dry shrubs to the exterior and...

... inside along the walls we placed a mixture of medium ballast and sand then topped it off with a bit of the ground cover.

Now we add an Empire Great Canon and crew and wait for the enemy to advance into our field of fire.

It's always good to add extras like barrels, tools, canon balls, powder kegs and similar items.

This emplacement could be used for Warhammer Fantasy, Napoleonic Historical or Warhammer 40k.

Also any other Sci-Fi and any alternative games like maybe some new Steampunk light artillery for In Her Majesty's Name.

There you have it, the dwarves can now defend the pass to their mountain stronghold.

Let us know what you like about this or any other posts you'd like to see.

Have a Great Battle!
The Old Crow

Thursday, November 28, 2013

How To: Build an Artillery Emplacement - Part One

How To: Build an Artillery Emplacement

We did artillery the last two posts so today we'll show you how to build an emplacement for your artillery whether it be Steampunk, Fantasy, Historical or 40K. We started with 1/2 in polystyrene scraps which were cut to a rough shape.

How To: Build an Artillery Emplacement
We shaved them down with a utility knife and glued the top pieces and pinned them with toothpicks for extra strength. The base is a square of MDF board.

How To: Build an Artillery Emplacement
Next take round toothpicks and cut them to various but similar lengths. Measure the height of your foam to make sure the sticks are the correct height.

How To: Build an Artillery Emplacement
Then glue the sticks onto the interior of the artillery emplacement. The various heights will add to a more authentic look.

How To: Build an Artillery Emplacement
Work your way around until the entire area is covered.

How To: Build an Artillery Emplacement
For the ground we used joint compound and mixed some craft glue into it to add to the durability.

How To: Build an Artillery Emplacement
To create chewed up ground from moving the canons around we drug a finished one through the wet joint compound.

How To: Build an Artillery Emplacement
And a final building stage we placed additional joint compound on the foam seams and glued heavy ballast on for the painting stage. Next post we will do painting and detail work.

Have a Great Battle!
The Old Crow