Thursday, November 28, 2013
How To: Build an Artillery Emplacement - Part One
We did artillery the last two posts so today we'll show you how to build an emplacement for your artillery whether it be Steampunk, Fantasy, Historical or 40K. We started with 1/2 in polystyrene scraps which were cut to a rough shape.
We shaved them down with a utility knife and glued the top pieces and pinned them with toothpicks for extra strength. The base is a square of MDF board.
Next take round toothpicks and cut them to various but similar lengths. Measure the height of your foam to make sure the sticks are the correct height.
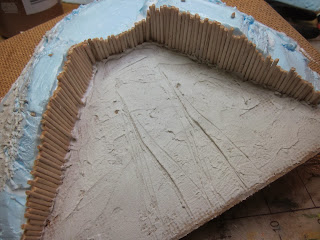
Then glue the sticks onto the interior of the artillery emplacement. The various heights will add to a more authentic look.
Work your way around until the entire area is covered.
For the ground we used joint compound and mixed some craft glue into it to add to the durability.
To create chewed up ground from moving the canons around we drug a finished one through the wet joint compound.
And a final building stage we placed additional joint compound on the foam seams and glued heavy ballast on for the painting stage. Next post we will do painting and detail work.
Have a Great Battle!
The Old Crow
Subscribe to:
Post Comments (Atom)


No comments:
Post a Comment