Showing posts with label Orcs and Goblins. Show all posts

Tuesday, March 3, 2020

Dragon Rampant Fantasy War Gaming from Osprey Publishing

Over the holidays and into the new year we discovered Dragon Rampant, the wonderfully simple fantasy war game from Osprey Publishing!

After the last few years of Bolt Action it was grand breaking out the old fantasy figures and putting them into action. The beauty of the game, created by Daniel Mersey, is the fact you can use virtually any fantasy figure you have or like! His previous game Lion Rampant is the historical equivalent of the same game. The Command and Control aspect is where the game differs from others.

It's not as simple as you move, enemy moves, you move, etc..  You begin by giving a command to one unit and if it passes, then you go to another unit and test. If it passes your turn continues, but the first time you miss a command test, then your turn is over. You can have a turn where you move every unit in your army just as easily as failing your first test and ending your turn that fast.

Armies are made up of an average of 5-8 units with anywhere from 1-12 figures. A basic infantry unit has 12 figures and a basic cavalry unit has 6.

Here we have a 24 point army with 12 Heavy Foot, 6 Heavy Riders, Heavy Missiles, 12 Belicos Foot and the army general is an Elite Rider with the Flying Special Rule

If you like Orcs and Goblins, they are just as easy to build a 24 pt army. The spider riders are Light Riders, the wolf riders act as Heavy Riders, The general is a single model that stands as a unit of Elite Riders so he will have the same number of wounds as a six model count unit. On the right is a 12 orc unit of Belicose Foot which act like beserkers with high offence and low defense. And a six model count Heavy Foot unit. Heavy Foot normally have 12 models so can take 12 wounds. Each wound removes one model. With a reduced model count unit of 6, each model can take 2 wounds before being removed.

Here a heavy hitting Lizardman army, also 24 points, has a Greater War Beast, two units of  Belicose Foot, and a reduced model count Heavy Foot unit consisting of only 3 models. Because it is still a 12 wound unit, each model can take 4 wounds before being removed. The general is acting as a unit of Elite Foot

The army builds are evenly balanced so every army has an even chance. The rule book gives you an Overview, Understanding the basics,
Playing the game section, How to build your Army list, basic Strategies and tactics, Sample armies, 6 easy Scenarios and lastly a Campaigns section.

Yes that is an undead T-Rex.

Here the orc Belicose Foot charge into a Greater Warbeast as the Heavy Foot move in for the kill.

You can build an army using any figures YOU like!! So go wild with it and try out as many options as you like. The one army here has A Greater War Beast with the fly rule, 2 giants are Lesser War Beasts and the Chariots are Heavy Riders with the chariot special rule!


So break out those fantasy figures and Have A Great Battle!!
The Old Crow

Sunday, July 24, 2016

4Ground Accessory Kits: Utility Cart & Czech Hedgehogs

4ground Utility Cart
Lets take a quick look at a few additional 4Ground laser cut kits! The The 19th-20th Century horse drawn utility cart and the Czech Hedgehogs. Here we see the Utility cart providing some cover for our British Commandos.

4ground Czech Hedgehogs
And the Hedgehog anti tank obstacles provide a formidable defense against the advancing Soviet armor.


4ground Utility Cart and Czech Hedgehogs
Each kit is around 7 USD and are quite simple to assemble.

4ground Utility Cart
The Utility Cart is one piece of laser cut board and carries a 4Ground skill rating of 3. This means glue is required and an average difficulty in assembly.
4ground Utility Cart

The pieces were well cut and the instructions were easy enough to follow.  Make sure to do each step and don't jump ahead or you might need to take something apart to get it together. It should only take you 15 minutes or so to glue it together.

4ground Utility Cart
Its a nice addition to a farmyard or rural area and can be used for many historical and fantasy war-games.

4ground Utility Cart
Use it for a baggage train in any black powder games.

4ground Utility Cart
Or you can make it carrying a priceless relic to be defended or for your Orc horde to capture! No matter how you look at it, it is a swell little kit.

4ground Czech Hedgehogs
The Czech Hedgehogs are rated at a level 4, which means some adult supervision may be needed along with glue and tweezers.

4ground Czech Hedgehogs
An assembly line approach is good for these guys. First build all the cross members side A, then the supports, flip and add side B and then glue the two pieces together.

4ground Czech Hedgehogs
It might sound more complicated than it is. Unfortunately they went together to fast to take step by step pictures. There are optional bases provided for your convenience.

Anyways, they are both very nice kits, especially for the price!

Til next time, Have a Great Battle!
The Old Crow

Thursday, June 27, 2013

Warhammer 40k: Da Green Baron Fighta Bomma

In our ever broadening attempts to find the odd and wonderful miniatures for wargaming, we bring you Da Green Baron, Fighta Ace of First Ragna-Ork War, Fighta Bomma!

Some intrepid Mek came up with a doozy here.

Da Green Baron is armed with four big shootas...

.. and up to your choice of four grot bombs or suparockits, mix and match if you like.

The finely detailed miniature is resin cast, with metal elements.

As usual, the model is sold unassembled and unpainted.

You can probably score one of these beauties on eBay, we haven't found them anywhere else.

Have a Great Battle,
The Old Crow

Sunday, April 28, 2013

Ruglud's Armoured Orcs Dogs of War Unit Completed!

Ruglud's Armoured Orcs Dogs of War Unit
Last summer we did a post on How to Build Ruglud's Armored Orcs and never showed the finished models. Well today we rectify that error. Here they are in all their orcyness. The entire unit works well together and all have collected their mementos from past battles.
Ruglud's Armoured Orcs Dogs of War Unit
We'll review the individual models in the order we showed you in the previous post.

Here are the first two of Ruglud's boyz, both have items raided from the lizardmen across the pond in Lustria.

Ruglud's Armoured Orcs Dogs of War Unit
Next the veteran from the Dwarf Wars sports a miners pick.

Ruglud's Armoured Orcs Dogs of War Unit
This orc boy has some chaos warrior armor and sword.

Ruglud's Armoured Orcs Dogs of War Unit
Sporting a dwarf shield as a breast plate.

Ruglud's Armoured Orcs Dogs of War Unit
More dwarf mementos

Ruglud's Armoured Orcs Dogs of War Unit
These guys have some chaos and Empire memorabilia...

Ruglud's Armoured Orcs Dogs of War Unit
... and additional items from Lustria

Ruglud's Armoured Orcs Dogs of War Unit
And lastly as I mentioned, my favorite raided a Tomb King treasure trove and brought the kings head back to prove it.

Ruglud's Armoured Orcs Dogs of War Unit
Kings shield carried on his back too.

Ruglud's Armoured Orcs Dogs of War Unit
So there you have them all individually and together!

Have a Great Battle,
The Old Crow

Tuesday, March 12, 2013

How To Build a Battering Ram with Carriage for your Siege

How to build a Siege Battering Ram with Carriage and Canopy for Warhammer We showed you how to build a simple log ram earlier in this siege series, now we are going to build a larger carriage mounted battering ram for bashing your way through castle walls!! It will be a basic A frame with an extended canopy

How to build a Siege Battering Ram with Carriage and Canopy for Warhammer
We started with a 36 x 1/4 inch hobby stick. You can easily use balsa wood too. We cut it into five 5 inch lengths and two 2 inch lengths. We also used four 1.5 inch wooden circles with 1/8th inch holes drilled in them.

How to build a Siege Battering Ram with Carriage and Canopy
Two of the sticks will be cut for the uprights. Measure 2.5 inches for the center and out approx 1/8th inch to each side. cut this angle for meeting the base. then cut an approx check mark from the opposite end as you see in the image above.

How to build a Siege Battering Ram with Carriage and Canopy
Now to assemble the base for your battering ram's carriage. Glue the 2 inch length sticks inside two of the 5 inch ones. You can use your hobby knife to cut grooves and notches into the beams for realistic texture.

How to build a Siege Battering Ram with Carriage and Canopy
Next, cut horizontal lines onto all four of the wheels. These notches will give the appearance of wheels assembled from planks.

How to build a Siege Battering Ram with Carriage and Canopy
Now the uprights. Glue the bottom angles onto the longer stick just behind the crossbar. Make sure the check marks face inside so they can seat the top stick of the frame as you see here.

How to build a Siege Battering Ram with Carriage and Canopy
Lets move on to the canopy supports. They will extend from the uprights at an upward angle. Our longest dimension on the short supports was approx. 3/4 of an inch. The angles can be cut to your liking, we used a slight 80 degree and the opposing side is approx 65 degrees. The canopy supports are 1/4 x 1/8 inch boards cut to approx 1.75 inch length with angles on one end of each.

How to build a Siege Battering Ram with Carriage and Canopy
They will be assembled as this image. We glued the short supports onto the long ones before attaching them to the main structure.

How to build a Siege Battering Ram with Carriage and Canopy
Here you can see the supports attached to the battering ram carriage. If the angles do not quite meet the glue can fill the gaps and hold it all together.

How to build a Siege Battering Ram with Carriage and Canopy
Here is the completed carriage that will hold the ram and canopy. We used supports to hold our axles 1/8 inch dowels. This will allow it to roll along. You can just as easily glue the dowels right to the carriage base.

How to build a Siege Battering Ram with Carriage and Canopy
Next, you'll need a suitable head for your ram. You can leave it as just a log, but where's the fun in that? We imagined an Empire Count who went over to Lustria and saw some of the great stegadons used by the lizard men. He found them scary enough so made his ram head to resemble one. Then the orcs stole it from him. So here we found two options in our junk box.

How to build a Siege Battering Ram with Carriage and Canopy
The red guy won so OFF WITH HIS HEAD!! Using clippers we separated him from his head.

How to build a Siege Battering Ram with Carriage and Canopy
Use a pin drill to add a hole in each piece, the head and dowel. We used a 1/2 inch dowel for our log. Place a pin (piece of a paperclip will work) into the head and once you have the right length, glue it into both parts.

How to build a Siege Battering Ram with Carriage and Canopy
Now you'll need to attach the fine battering ram to the carriage support. We recommend a thin hemp or cotton string as seen here. A simple loop over the log will get you started. You can use a slip knot and just cut off any tail remaining behind. Wrap it around your log a few times and then wrap up and over the top support. After going around the upper support, go back down and attach it to the log one more time.

How to build a Siege Battering Ram with Carriage and Canopy
Repeat the steps for the other end and you'll be looking good!

How to build a Siege Battering Ram with Carriage and Canopy
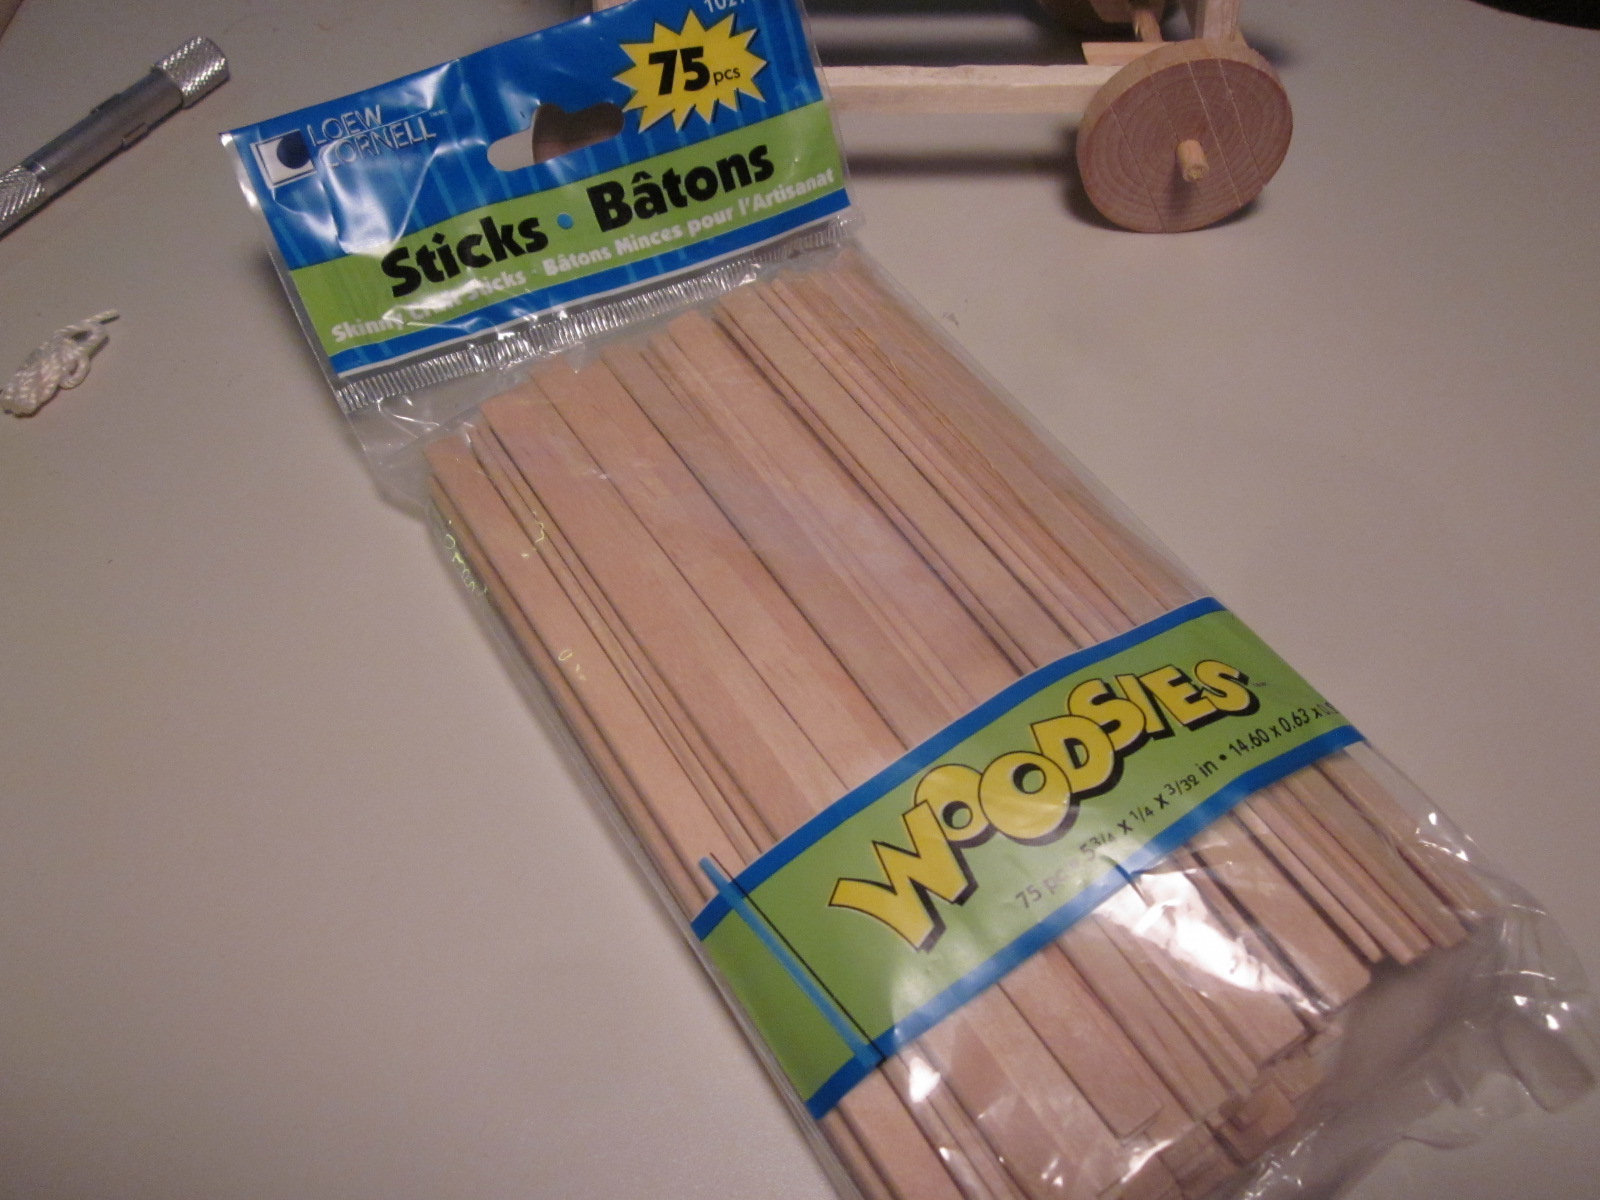
Now the canopy. We found theses sticks at a local craft store for 3.49. The are fairly uniform and few had any warping. We'll need 16-20 for our canopy.

How to build a Siege Battering Ram with Carriage and Canopy
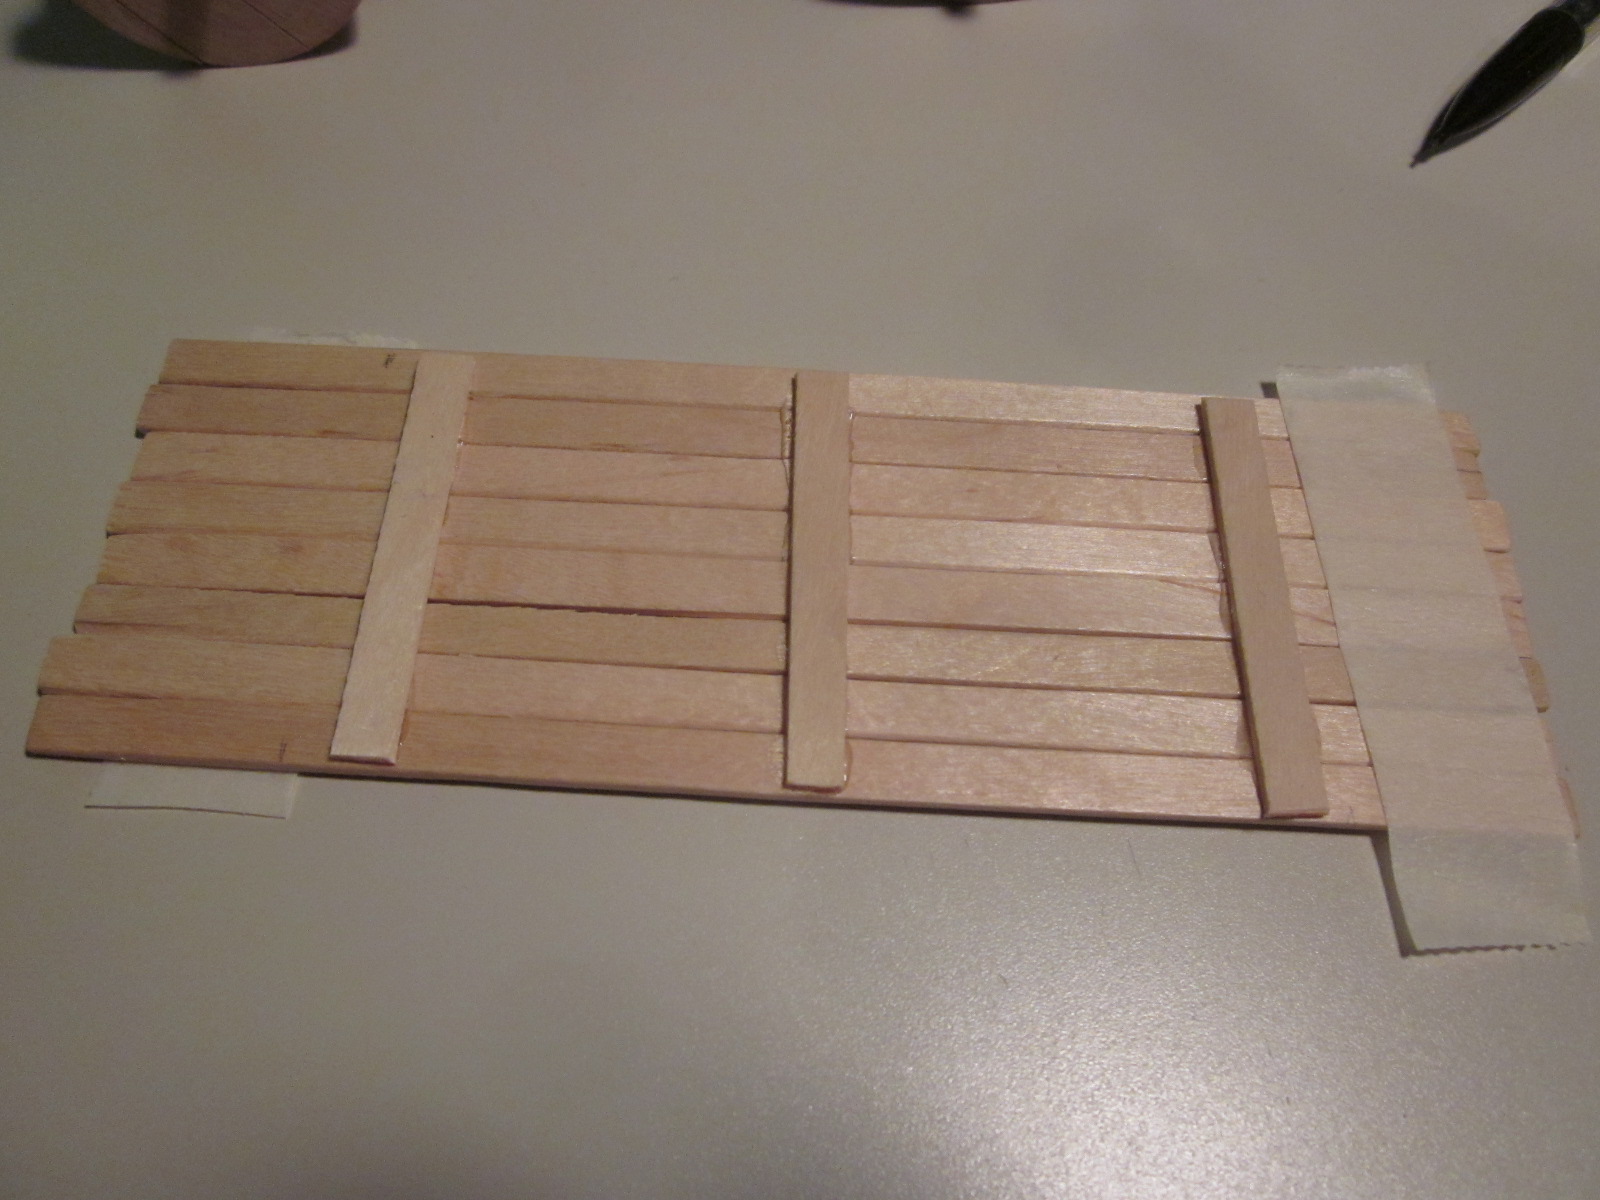
Once measured it was determined that 8 sticks would fit perfectly. First tape them together and cutting a couple others for cross supports, apply the glue to them and press in place.

How to build a Siege Battering Ram with Carriage and Canopy
If you are cost conscious, you can use wooden coffee stirrers gathered from your local coffee spot. You'll need to keep trying for the straight ones as they tend to be prone to warping.

How to build a Siege Battering Ram with Carriage and Canopy
.Make two of the roof pieces and glue them onto your supports. You should have something resembling this.

How to build a Siege Battering Ram with Carriage and Canopy
Now you probably don't want the castle defenders dropping hot oil or flaming arrows on your nice battering ram canopy so we'll need a defense. In medieval times they would cover the top with animal hides for protection. We drew a "cow" skin pattern and cut it out of a brown paper bag.

How to build a Siege Battering Ram with Carriage and Canopy
 You'll need a good many, we used 19 or them. Once you have them cut out, crumple them into little balls like you see here.

How to build a Siege Battering Ram with Carriage and Canopy
Next get a small container, some PVA glue and all your skins. Pour a bit of water into the container and then add enough glue to create a milky consistency.

How to build a Siege Battering Ram with Carriage and Canopy
Place a few of the "cow" hides into the mixture and make sure they get soaked through.

How to build a Siege Battering Ram with Carriage and Canopy
Pull them out one at a time and apply them to the canopy. Here's our first two. They will shrink slightly so leave enough overhang.

How to build a Siege Battering Ram with Carriage and Canopy
Keep layering the skins on. You can add some extra glue to be sure they stay put.

How to build a Siege Battering Ram with Carriage and Canopy
Here's what you'll have once completed.

How to build a Siege Battering Ram with Carriage and Canopy
While they are still damp add a few washes of various browns for some variety.

How To paint your Battering Ram with Carriage
Now onto painting the carriage. We primed everything black, well dark gray. We added a wash of black into the wheel recesses.. Once it dries, add a dark brown like Burnt Umber.

How To paint your Battering Ram with Carriage
Apply the same color to the rest of the battering ram carriage.

How To paint your Battering Ram with Carriage
You'll then want a medium brown, we used nutmeg. And lastly a highlight color. We used Mushroom for our highlights. Here are all three stages.

How To paint your Battering Ram with Carriage
Paint the rest of the ram and carriage the same way as the wheels. Use a dry-brush for the highlight color.

How To paint your Battering Ram with Carriage
Next for the ram head itself, we used Wrought Iron after our base coat of black, it has a nice bluish hue. Then we dry-brushed the head with "Metallic Gunmetal" and highlighted with "Aluminium".

Warhammer Siege Battering Ram with Carriage and Canopy
And there you have it. A Siege Battering Ram with Carriage and Canopy!

Warhammer Siege Battering Ram with Carriage and Canopy
Here it is from the front side.

Warhammer Siege Battering Ram with Carriage and Canopy
Now the Orcs and Goblins just recruit a giant and have him push it into place.

Warhammer Siege Battering Ram with Carriage and Canopy
We hope you enjoyed this "How To" post. Please let us know how much with a comment or an email. We're planning an encampment for our siege so stay tuned for our next post in the series!

Warhammer Siege Battering Ram with Carriage and Canopy
Have a great Battle!
The Old Crow