Here is the beginning of our customized Warhammer 40k Space Marine squad to go with the Lost Legion Dreadnoughts. Did a great deal around the house today and finally had an hour to squeeze in a few conversions. These were a set of 10 Space Marines picked up used, cut up a bit and converted to fit our "Lost Legion" feel. If you missed the Dreadnought post, these guys have been stranded out on the edge of space and living off the land.
They have a hodge podge of weapons scavenged off the battlefield. Our squad leader is packin an orc shoota and has a choppa slung over his jump pack. He also is sporting a sidearm and plenty of ammo pouches.
Next is our rifleman. He's taken up a Necron sniper rifle and has held on to a few grenades. He also has a charging pack slung on his back belt under the jump pack
This Space Marine is carrying a traditional bolter but has also scrounged up a Tau weapon converted from a downed drone.
There is a heavy weapon specialist, you can see above, who received a standard rocket launcher, extra sidearm and grenades Then there's this guy.
We wanted something a little more dynamic so we gave him an orc shoota and an outstretched chainsword arm to look like he's on the attack. Using Necron bits a destroyed warrior was mashed together and the Marine positioned like he was running over top of the fallen enemy. We added ammo pouches, a sidearm and other extras.
Seeing the big rings on the side of the shoota, we decided to hook on some grenades., He can sling the gun over toward his left hand grab, shoot and throw! We'll post more as they get finished.
Have a Great Battle!
The Old Crow
Showing posts with label Conversions. Show all posts
Monday, September 1, 2014
Sunday, July 6, 2014
Warhammer 40k Dreadnought Conversion - Part 2
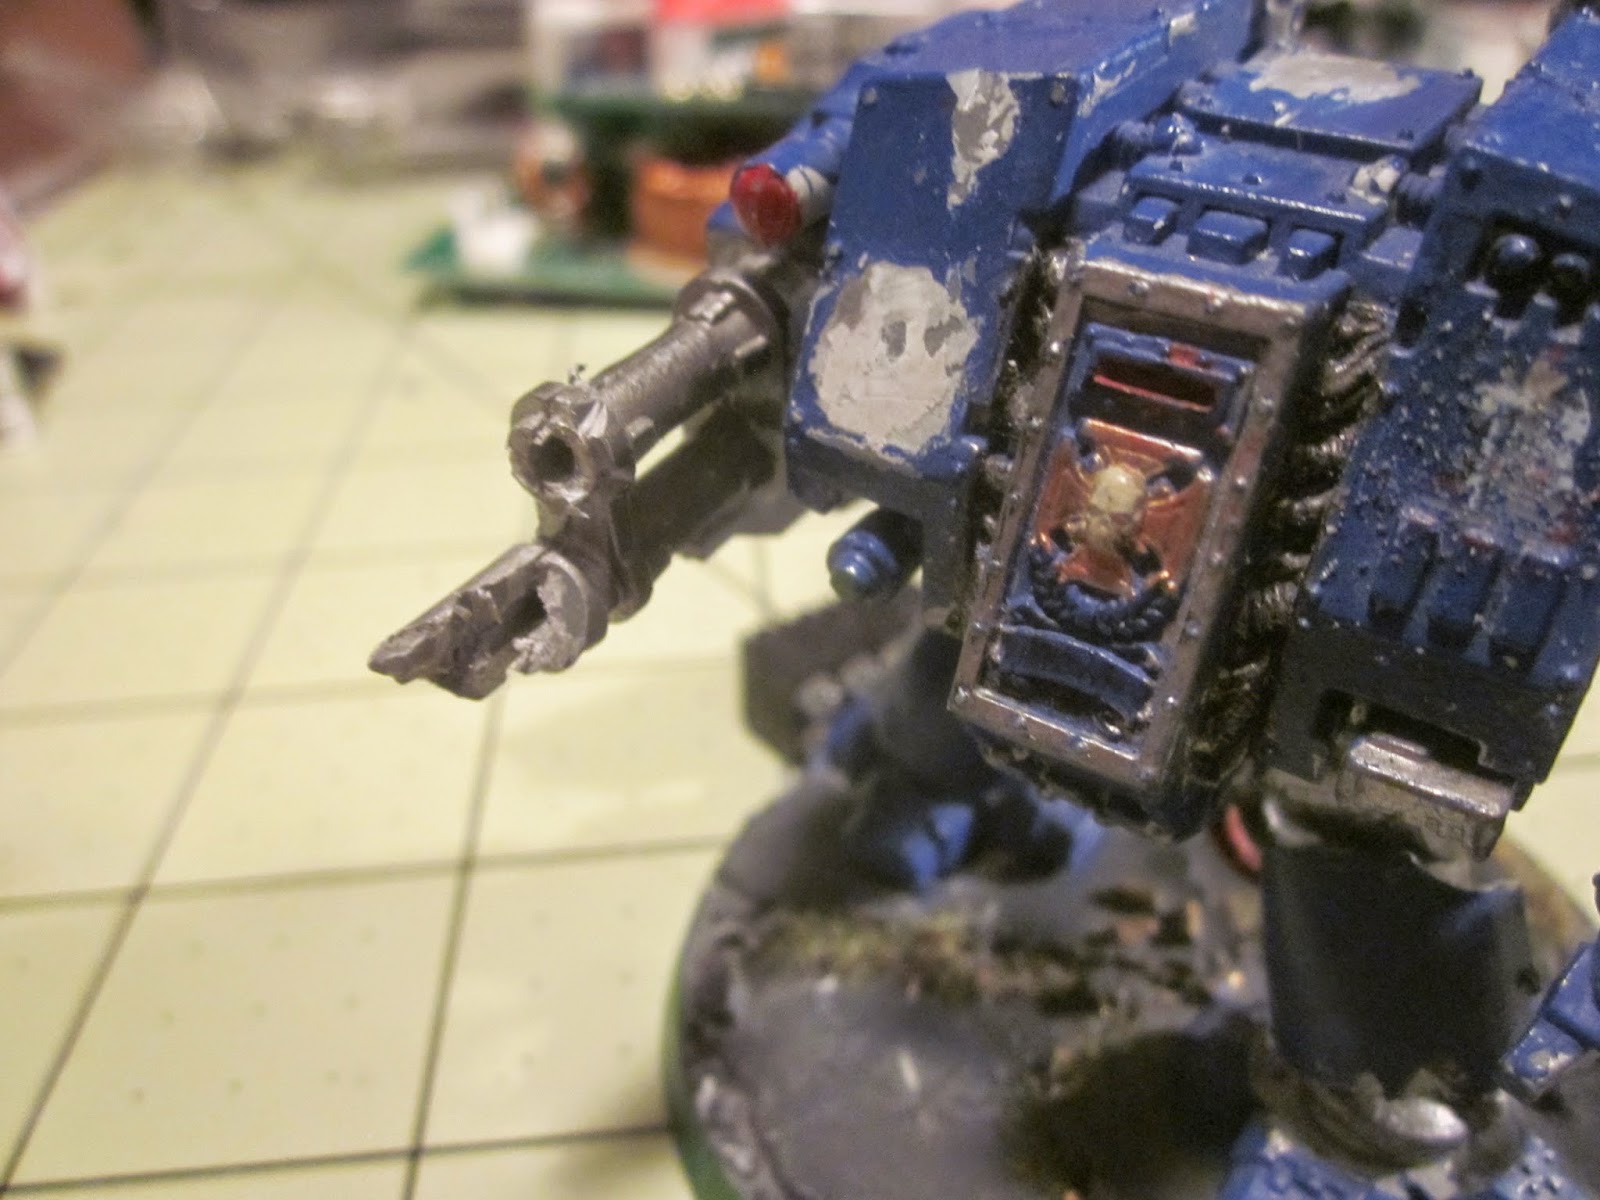
OK the first Warhammer Dreadnought conversion went well so onto Part 2! As mentioned previously, the two dreadnoughts were picked up from eBay and cost less than one new one. So cutting them up wasn't a problem. In our scenario of the lost legion, these guys are stranded and have to repair and replace things with whatever they can. This guy had a duel Lascannon for it's right arm and we cut it up to look like it took a direct hit or exploded from overuse.
We had a random spare gun in our parts bin and a piece of plastic tubing to beef up the barrel. The existing barrel was trimmed and shaved to receive the new one. For theme sake we figured it was a local area turret mounted cannon that was scavenged and made to fit the Dreadnought.
It was attached to the outside of the arm in a manner to look integrated on the fly. A spare computer part was added as a gravity feed ammo clip.
Extra armor plating was added and was intentionally rough cut to go with our theme. Some traditional stowage and more futuristic looking parts were placed on the top between the shoulders.
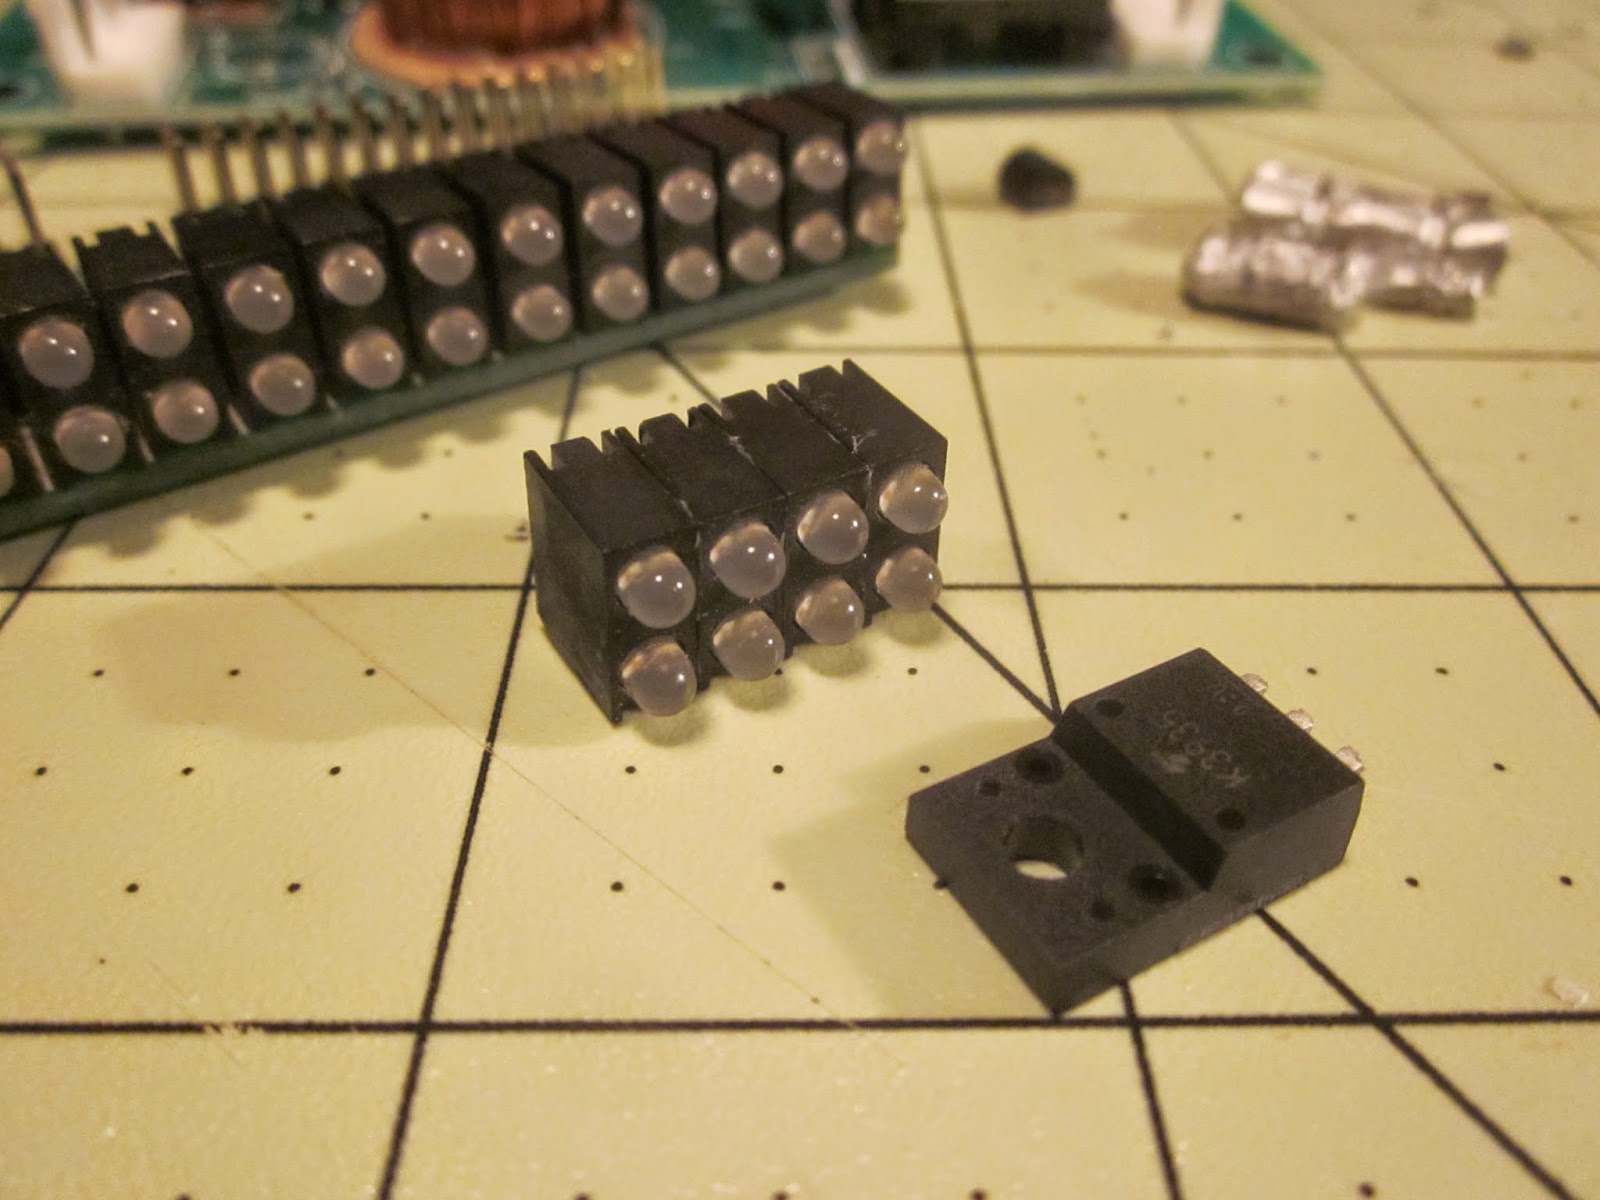
This was the circuit board from a network switch and we felt the indicator lights looked like missile pods. Four of the pairs were cut off the board and glued together. A second part will be added as the "mounting" bracket
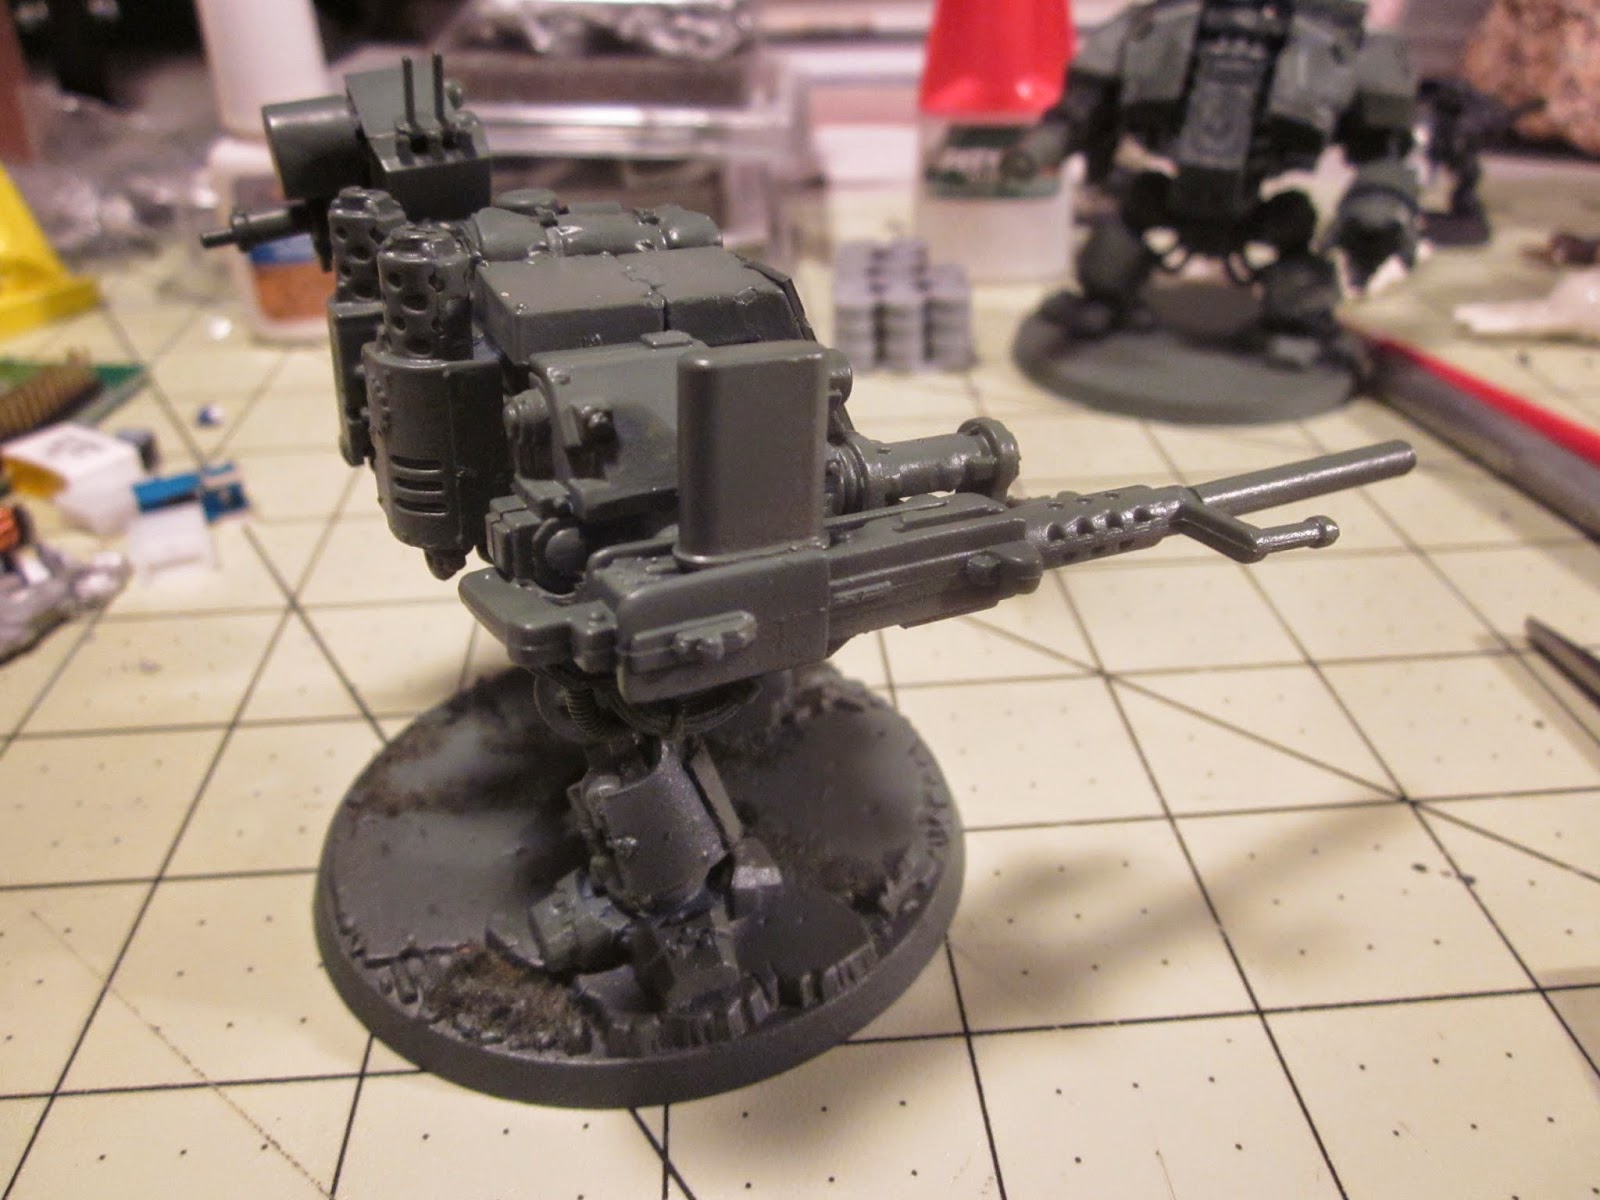
Additional components were added as communication equipment, a rear mounted cooling system was attached...
and the assembly was mounted on the left arm.
Here you can see the "cooling system" and the lower part is a mounting-reloading arm attachment we created from additional spare computer parts.
Extra armor plates were attached to the left torso and right lower leg and we primed him with the same Italian Olive as the first Dreadnought.
Now he's ready for painting too!
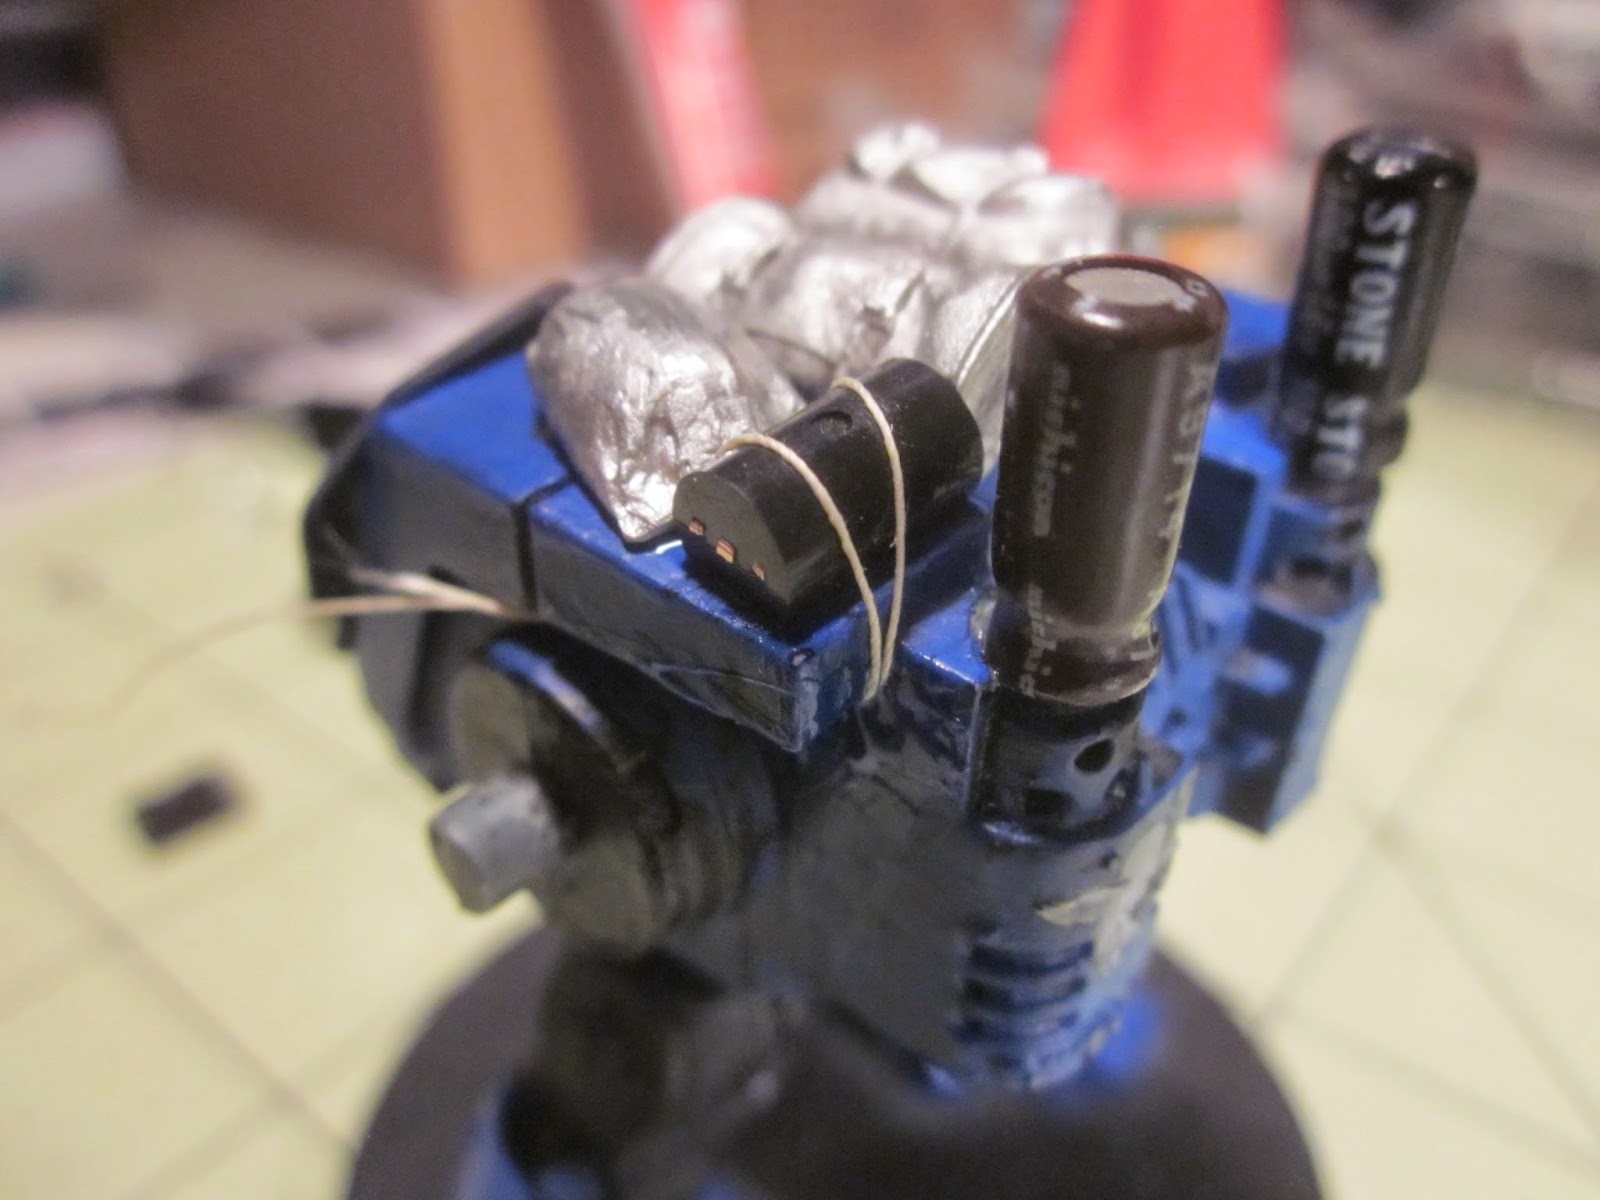
Here's a great view of the rear mounting of the missile pod.
And there you have it, next we'll get to some troops and possibly a transport or two.
Have a Great Battle,
The Old Crow
We had a random spare gun in our parts bin and a piece of plastic tubing to beef up the barrel. The existing barrel was trimmed and shaved to receive the new one. For theme sake we figured it was a local area turret mounted cannon that was scavenged and made to fit the Dreadnought.
It was attached to the outside of the arm in a manner to look integrated on the fly. A spare computer part was added as a gravity feed ammo clip.
Extra armor plating was added and was intentionally rough cut to go with our theme. Some traditional stowage and more futuristic looking parts were placed on the top between the shoulders.
This was the circuit board from a network switch and we felt the indicator lights looked like missile pods. Four of the pairs were cut off the board and glued together. A second part will be added as the "mounting" bracket
Additional components were added as communication equipment, a rear mounted cooling system was attached...
and the assembly was mounted on the left arm.
Here you can see the "cooling system" and the lower part is a mounting-reloading arm attachment we created from additional spare computer parts.
Extra armor plates were attached to the left torso and right lower leg and we primed him with the same Italian Olive as the first Dreadnought.
Now he's ready for painting too!
Here's a great view of the rear mounting of the missile pod.
And there you have it, next we'll get to some troops and possibly a transport or two.
Have a Great Battle,
The Old Crow
Wednesday, July 2, 2014
Warhammer 40k Dreadnought Conversion
After a really rough June which included a high school graduate, a college graduate and a wedding I finally have a minute to breath! Sorry for the lack of posts but hopefully you understand to some degree, Now on to modelling.
Had picked up a few Warhammer Dreadnoughts on eBay with plans on doing some conversions and finally got the project underway. To start all the upper markings and skulls were shaved off and the arms removed. Battle damage was added over the entire model. The goal was to make this guy look like he's been out on his own for a while. So repairs had to be made with whatever was scavenged from the battlefield and parts would need to be taken along in case something was damaged.
The Power Fist had the same battle scarring treatment and removed markings
For the other arm we went for the Assault Cannon with modifications. Originally we were going to add a larger barrel but decided on another route.
Going through the recycled parts bins I found a few items to use on this conversion. The silver gun looking part on the left is what was used to modify the autocanon.
Also picked up a "Stowage" pack from Warlord Games to be used on a few different projects.
OK the first addition were extra armored plates that resembled Tau parts that may have been taken from a deceased battlesuit.
Planning on stowage, we extended the exhaust pipes. We removed the markings from the rear too.
Here he is with the first parts added. A piece was attached to the hip joint to appear as a repair from non-conventional parts.
Next came the stowage. After playing around with a couple variations we settled on this configuration.
We wanted futuristic stowage too. Here is the first non-traditional stowage container. To hold it on it would need tied down somehow. We applied some superglue gel and placed two pieces of string onto the top of the dreadnought. Then we stuck the part on top of it.
Once it dried, we pulled the two pieces over and tucked them under the shoulder. We secured them with additional gel
Next we found some gear like parts and ran thread through them. We glued the parts together before attaching them.
Before gluing the gears on we added two additional pieces of thread. These will go over the last two pieces of futuristic stowage containers.
As before, once it dried we pulled the thread over and tucked it under the shoulder armor.
A quick coat of Italian Olive primer and this guy is ready for painting. But before that, off to Dreadnought number two. Stay tuned for more!
Here's a few parting shots of the finished Dreadnought conversion!
Have a Great Battle,
The Old Crow
Had picked up a few Warhammer Dreadnoughts on eBay with plans on doing some conversions and finally got the project underway. To start all the upper markings and skulls were shaved off and the arms removed. Battle damage was added over the entire model. The goal was to make this guy look like he's been out on his own for a while. So repairs had to be made with whatever was scavenged from the battlefield and parts would need to be taken along in case something was damaged.
The Power Fist had the same battle scarring treatment and removed markings
For the other arm we went for the Assault Cannon with modifications. Originally we were going to add a larger barrel but decided on another route.
Going through the recycled parts bins I found a few items to use on this conversion. The silver gun looking part on the left is what was used to modify the autocanon.
Also picked up a "Stowage" pack from Warlord Games to be used on a few different projects.
OK the first addition were extra armored plates that resembled Tau parts that may have been taken from a deceased battlesuit.
Planning on stowage, we extended the exhaust pipes. We removed the markings from the rear too.
Here he is with the first parts added. A piece was attached to the hip joint to appear as a repair from non-conventional parts.
Next came the stowage. After playing around with a couple variations we settled on this configuration.
We wanted futuristic stowage too. Here is the first non-traditional stowage container. To hold it on it would need tied down somehow. We applied some superglue gel and placed two pieces of string onto the top of the dreadnought. Then we stuck the part on top of it.
Once it dried, we pulled the two pieces over and tucked them under the shoulder. We secured them with additional gel
Next we found some gear like parts and ran thread through them. We glued the parts together before attaching them.
Before gluing the gears on we added two additional pieces of thread. These will go over the last two pieces of futuristic stowage containers.
As before, once it dried we pulled the thread over and tucked it under the shoulder armor.
A quick coat of Italian Olive primer and this guy is ready for painting. But before that, off to Dreadnought number two. Stay tuned for more!
Here's a few parting shots of the finished Dreadnought conversion!
Have a Great Battle,
The Old Crow
Sunday, June 3, 2012
Warhammer Empire Hero on Griffon Conversion
You may recognize the High Elf Griffon from the Gamesworkshop Island of Blood box set, but this time we're putting an Empire Hero on its back.
We started this nifty little project with a box of bits, an old empire hero from two box sets ago and some Mordheim and spare sprues for the extra bits. Some carving was done to get the heroes body to fit in with the legs from the high elf. Greaves were added to hide the elfish armor and a bed roll was inserted behind the rider to cover the small gap there.
We used a dwarf hammer left over from another old box set, removed the lance in his hand and placed it behind the Empire Hero.
The crossbow with coiled rope and bolt quiver were added from an old Mordheim Adventurers box set. An Empire feathered headdress was also used on the griffons head. A shield will be added to finish off the rider once the painting is completed.
Painting is just getting underway. We'll post images of this work in progress when the project is finished.
Have a Great Battle!
The Old Crow
We started this nifty little project with a box of bits, an old empire hero from two box sets ago and some Mordheim and spare sprues for the extra bits. Some carving was done to get the heroes body to fit in with the legs from the high elf. Greaves were added to hide the elfish armor and a bed roll was inserted behind the rider to cover the small gap there.
We used a dwarf hammer left over from another old box set, removed the lance in his hand and placed it behind the Empire Hero.
The crossbow with coiled rope and bolt quiver were added from an old Mordheim Adventurers box set. An Empire feathered headdress was also used on the griffons head. A shield will be added to finish off the rider once the painting is completed.
Painting is just getting underway. We'll post images of this work in progress when the project is finished.
Have a Great Battle!
The Old Crow
Monday, October 24, 2011
Warhammer 40k Space Marine Bolter Conversion
Welcome back to Battleground Hobbies!
Today we are going to look at a simple yet effective conversion for space marines and other races in the Warhammer 40k realm. First thing you need is some1/8 inch plastic tube. You can try 5/32 too but we liked the 1/8 for space marine bolters. Other races may require larger diameter tubing, it depends on the size of the weapon at hand.
We picked up item 224 from Evergreen Scale Models. They came 5 to a pack and are 14 inches long, so you can do a great number of marines.
Experiment with the length, we recommend anywhere from 1/4 to 3/8 of an inch for normal bolters. We simple shaved the bolter barrel down until it would insert it into the tubing.glue it in place as seen here.

Here you can see the painted conversion. We were going for a crack night ops special forces chapter. They get in, get the job done and get out before anybody knows they were there! The barrel length is 5/16"
Here you can see the extra long barrel for the "sniper" in the unit. This barrel length is 1/2" an inch long.

Other simple yet easy model modifications are simply using a pin drill to hollow out the gun barrels. It adds a bit of realism to the model if it looks like a projectile will actually come out of the gun.
I know, how real is a space pirate ork anyway.

And as long as we are on 40k orks and gun conversions, another easy one is to attach a chainsword to the bottom of any blaster for some hand to hand combat fun!
Try a couple of these easy conversions and let us know how they worked out for you!
Have a great battle!
The Old Crow
Today we are going to look at a simple yet effective conversion for space marines and other races in the Warhammer 40k realm. First thing you need is some1/8 inch plastic tube. You can try 5/32 too but we liked the 1/8 for space marine bolters. Other races may require larger diameter tubing, it depends on the size of the weapon at hand.
Experiment with the length, we recommend anywhere from 1/4 to 3/8 of an inch for normal bolters. We simple shaved the bolter barrel down until it would insert it into the tubing.glue it in place as seen here.
Here you can see the painted conversion. We were going for a crack night ops special forces chapter. They get in, get the job done and get out before anybody knows they were there! The barrel length is 5/16"
Here you can see the extra long barrel for the "sniper" in the unit. This barrel length is 1/2" an inch long.
Other simple yet easy model modifications are simply using a pin drill to hollow out the gun barrels. It adds a bit of realism to the model if it looks like a projectile will actually come out of the gun.
I know, how real is a space pirate ork anyway.
And as long as we are on 40k orks and gun conversions, another easy one is to attach a chainsword to the bottom of any blaster for some hand to hand combat fun!
Try a couple of these easy conversions and let us know how they worked out for you!
Have a great battle!
The Old Crow
Subscribe to:
Posts (Atom)