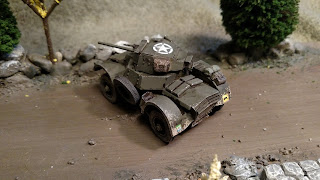
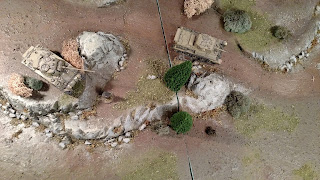
Well finally we have some additional armor for the Black Bull, British 11th Armoured Division. Here we have the completed A34 Comet Heavy Tank, a Cromwell MK IV and a Daimler MK 1 armored car.
The Comet, advancing toward the main road through the low stone wall....
and Cromwell making use of its bocage cutter, are patterned after the 29th Armoured Brigade's 2nd Fife and Forfar Yeomanry Regiment.
The Daimler is part of the supporting Recce Regiment, the 2nd Northhamptonshire Yeomanry.
The Daimler was a 4 wheel drive vehicle with a 2 pounder canon.
In Bolt Action it has the Recce rule to get out of sticky situations.
The Cromwell is a great all around medium tank in Bolt Action and still my favorite from World of Tanks!
Here you can see added stowage and the crew left their bucket hooked on the rear of the vehicle.
Now for some punch, the A34 Heavy Comet tank!!
This guy can pack a punch and has serious armor comparable to a Panther.
The A34 Comet was the last British tank type to enter the war. The 11th Armoured Division received the Comet in January of 1945.
Have a Great Battle!!!
The Old Crow
Showing posts with label Modelling. Show all posts
Showing posts with label Modelling. Show all posts
Sunday, August 18, 2019
Thursday, April 25, 2019
Sarissa World War Europe and Warlord Games Reinforcements for Bolt Action
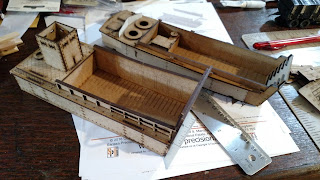
 We picked up these Sarissa World War Europe LCVP and LCM to try out for an eventual landing assault on the Atlantic wall.
There will be a need to fill those landing craft so we also started to build reinforcements from Warlord Games. A British Cromwell medium tank and a Daimler Mk1 armored car are in the process.
Additional infantry in the form of two Ghurka squads and an officer are being prepared too. The Warlord box set has a static firing squad and a squad charging into the fray! They are great miniatures and powerful troops on the tabletop.
The LCVP (Landing Craft Vehicle Personnel) or Higgins boat went together very quickly as did the Landing Craft Mechanized (LCM). That is a consistent plus to the Sarissa kits, ease of assembly.
The vehicles need some stowage and will be ready to prime.
Here are the landing craft primed grey. We have US Machine Gun Crews on order from Warlord Games...
and finally the first Ghurka squad and officer have been primed and received a base coat.
Have a Great Battle!!
The Old Crow
Monday, November 26, 2018
Reader Built Trebuchet, Siege Tower and Battering Ram!
 At Battleground Hobbies we enjoy sharing our love of designing, building and collecting scale models for table top war games. Sometimes we even get great feedback. Among our top posts are "How to Build a Siege Tower" and "Battering Ram" We recently received a comment on one of these.
A reader from Moscow left this: "Thank you. It's great! My son used your ideas for historical school project. Something was difficult and I helped him. He did this nice siege tower and trebuchet".
We thanked her and asked for some finished photos to share with everyone. We received this reply along with some photos: "I've sent you some photos of our siege engines. We also did a battering ram. There are plastic knights from my childhood on the photos. They were made in the mid 1970s."
Her son shows perseverance and determination!!
And he built a very nice trebuchet!!
Here's our post they refer too: "How To Build A Trebuchet"
If you have completed a project inspired by one of our posts, please share it with us!!
Have A Great Battle!!
The Old Crow
Monday, July 25, 2016
British Red Devils Jeeps From Warlord Games
The Red Devils Jeeps box set gives you fantastic components for creating some nice variants. Don't be afraid to grab items off of those old British Infantry or Commando sprues.
These guys are great for making a standard issue British Airborne Jeep, Signals Jeep or Recce Squadron Jeep
We just finished getting these boys assembled and couldn't wait to share them, even before painting. There was quite a bit of flashing on these which all had to be cut away. Don't get over zealous and cut away on yourself!
In wanting to add a bit of character, we added a few bits to our Recce jeeps. On the first jeep, we added a couple Vickers ammo drums on the front seat, gas can strapped to the fender...
spare pack in the back along with a light mortar and binoculars from the Commando sprues
Our second jeep received a similar assortment of packs, fuel can and stowage from the Warlord British Stowage Pack.
We also laid a Lee Enfield rifle across the front of the jeep in case the driver needed a little extra firepower.
The British Airborne Jeeps primary role was to tow support weapons such as 6 pounder anti-tank guns, 75mm pack howitzers, etc rapidly to where they were needed most.
Whilst remaining essentially the same vehicle as the standard issue Willy Jeep the British had to specially modify the Jeep to fit into the British Horsa glider.
The front bumper was cut back, A-frame attached for towing guns, removal of the windshield and several other modifications to allow it to be deployed by glider.
They were also utilized in the Recce Squadron as fast, mobile weapons platforms armed as they were with Vickers K machine guns. The Recce squadron made a habit of placing the spare wheel in front of the radiator grill to help protect the engine from gun fire.
Packed to the gunnels with baggage, fuel cans and batteries for the No. 22 wireless radio the British Airborne Jeeps were an essential part of the Red Devils make-up, allowing these elite troops to deploy fast and hard - often catching the enemy sleeping.
Have A Great Battle!
The Old Crow
Sunday, July 10, 2016
How To: Modular Game Tiles Part 2 (Bolt Action, Warhammer or Hail Ceasar)
AOK, Here we go back onto our Modular Game Tiles. This time we'll get some color and final touches on. Here's what it'll look like when done.
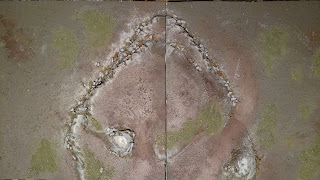
First off was to get things painted. Additional browns and grays were used on the hills and mountains. A light gray was used on the small rocks around the bases of the cliffs.
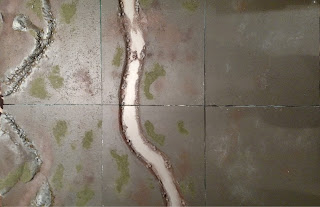
We added multiple browns to the river edges and decide on the river color. With battles raging, we felt a green and muddy look was better than blue this time. Mix brown with your water color on the edges and any shallows.
Next was to paint all the larger rocks with multiple light browns and grays. We also dry brushed a good deal of the texture in the base paint. Wanting to keep a duller look of war torn ground, we chose not to use normal green flocking. We started with a base green blend of woodland scenic blended turf. Then added a pale green of some finer material, crushed basil leaves and Italian seasoning. This was mixed in the container you see here.
The mixture was applied with watered down PVA glue in patches around the boards. A coarser mix was used in the rocky crevices. It started with less of the blended turf and added coarse turf, parsley flakes and additional Italian seasoning.
The hills configurations allows multiple ways to place them in the tiles. Here they are in a wide view.
Flip them around and here we see a more vertical look. The path still works for vehicles or siege engines.
And, flip them outward and there leaves a narrow escape lane easily defended from the two hills.
Add two river tiles and two blanks, and you are ready to play.
Swap out a blank for a river bend, change your mountains and ready again!
and again....
again...
As you can see, there are plenty of ways to configure these tiles.
Then you can put them into action!
Give your men a place to get a great view or launch a counter attack.
There you have it, we'd be happy to answer any questions you might have!
Have a Great Battle,
The Old Crow
Subscribe to:
Posts (Atom)


