We started by assembling various sticks to use for the boards. The base was cut 6 inches (15.25 CM) long and 2.5 inches (6.25 CM)wide. The sling arm is 11 inches (28 CM) in length. The height of the uprights is 6 inches (15.25 CM)
We drilled 3 holes in the arm so it could be adjusted forward or back. Holes in the uprights were drilled to match. The arm was made from 3 pieces glued together. The hemp twine was used to wrap around the arm for support.
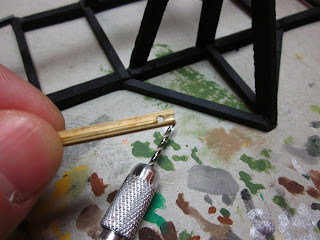
To create the winch to crank the arm down, we drilled a hole in either end of a small dowel with a pin drill. Make sure the holes are through at a 90 degree angle to each other.
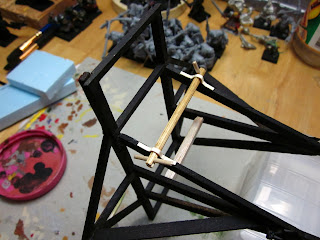
Insert a round toothpick in both holes and clip them off at about half an inch or 1.25 CM. We used thin cardstock strips to attach it to the angled support. This will mimic metal brackets holding it together.
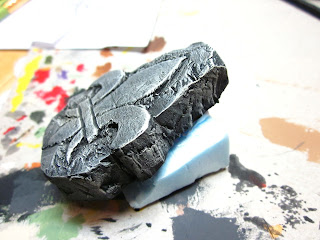
Now the weight for our trebuchet. This will be for a proud Bretonnian Duke so will display the fleur-de-lis. We did a quick sketch and being as this will be a model for gaming, decided to carve it out of foam.
Here is the stone carved with the fleur-de-lis.
We primed it black and added a layer of dark gray for the first coat.
Next use a medium gray and finally a drybrush of light gray.
Using a warm white, highlight the edges of the fleur-de-lis and outer edges of the stone.
Drill a hole through the two back supports of the arm and insert a small dowel or round toothpick for a pin. Use a heavy gauge wire make a long U shape, place it over the pin and push it down into the foam.
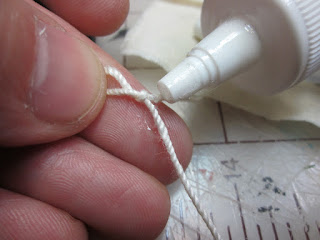
We then made a small loop on the other end, applied a touch of glue and wrapped the tail around the rest of the string.
Then drill another hole below the arm support and insert a piece of curved wire. The loop was slipped over it and the remainder of the wire loop was pushed in to secure it in place.
At the top of the arm, drill two small holes. One in the top and one on the underside just down from the top. The one on the bottom will also be curved to hold the bottom of the sling in place. The top wire is only bent slightly forward to allow the top loop the ability to release, thus hurling the contents upon thy enemies head!
The sling was cut from a small piece of fabric. Using a healthy amount of glue, wrap the same type of string around each end of the cloth. Allow enough string to add loops to both ends as we did for the winch.
As mentioned above, the bottom hook is attached with the loop of string in place.
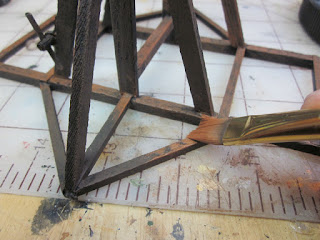
Now onto painting the body. Everything was primed in black and the first coat of color was burnt umber. Any dark brown will work.
Make sure to coat the twine used on the arm supports.
We wanted to go with a warm wood tone instead of a faded look so went with Nutmeg, a reddish brown, for the second coat. Use a wider flat brush and apply the color across the sticks. This allows some of the crevices to retain the darker colors already applied.
Here's the body once the nutmeg was finished. You can see the black and dark brown showing through, creating shadows and extra depth.
The entire trebuchet was then given a light coat of Golden Brown and then a finish light drybrush of Tan. This last step will go a long way to making the recesses pop out nicely.
A good coat of tan was applied to the twine binding the arm together and a final drybrush of Warm White was applied to finish the "rope supports".
A few details were added to the trebuchet, so lets get to them. On either side is a winged dragon which we decided would be bare metal work. Each was painted Gunmetal and highlighted with Aluminium. The winch supports were given the same treatment.
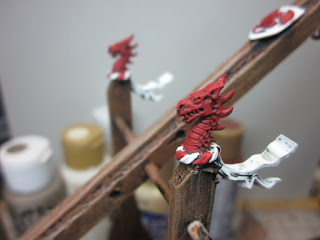
On the top of each upright we placed dragon heads with banners coming off the bottoms. We painted a rough coat of Clay Bisque over the bottom and banners.
The dragon heads were painted first with Brick Red...
secondly a coat of Tomato was applied. We also painted every other twist in the banner fabric around the dragons base.
A final light coat of Napthol Crimson brightened them up. The banners had a final coat of Warm White as well.
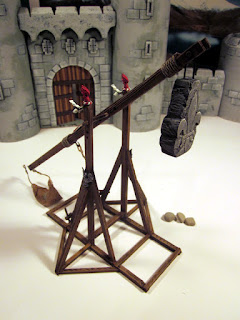
And there you have it. A fabulous and devastating trebuchet to aid your siege towers approach to castle walls.
The Bretonnian fleur de lis stone weight can be replaced by any other carving you prefer. Or for something more historical, a large wooden bin filled with rocks.
Once again, we hope you enjoy the tutorial and your trebuchet. Drop us a comment and let us know what you think!
Have A Great Battle,
The Old Crow














AMAZING!
ReplyDeleteI will build one tonight :)
Cool, let us know how it turns out!!
Delete