Showing posts with label 6th Edition Rulebook Summary. Show all posts

Friday, July 6, 2012

Warhammer 40K Terrain How To - Part Three - Buildings and Ruins

Warhammer 40k Terrain Pieces
Alrighty then! Here we are in part three of our how to build Warhammer 40k Terrain for our battlefield. Let's make some ruined buildings for our terrain collection.

When we're done it should look like this with part one and two added.

Building Warhammer 40k Ruins
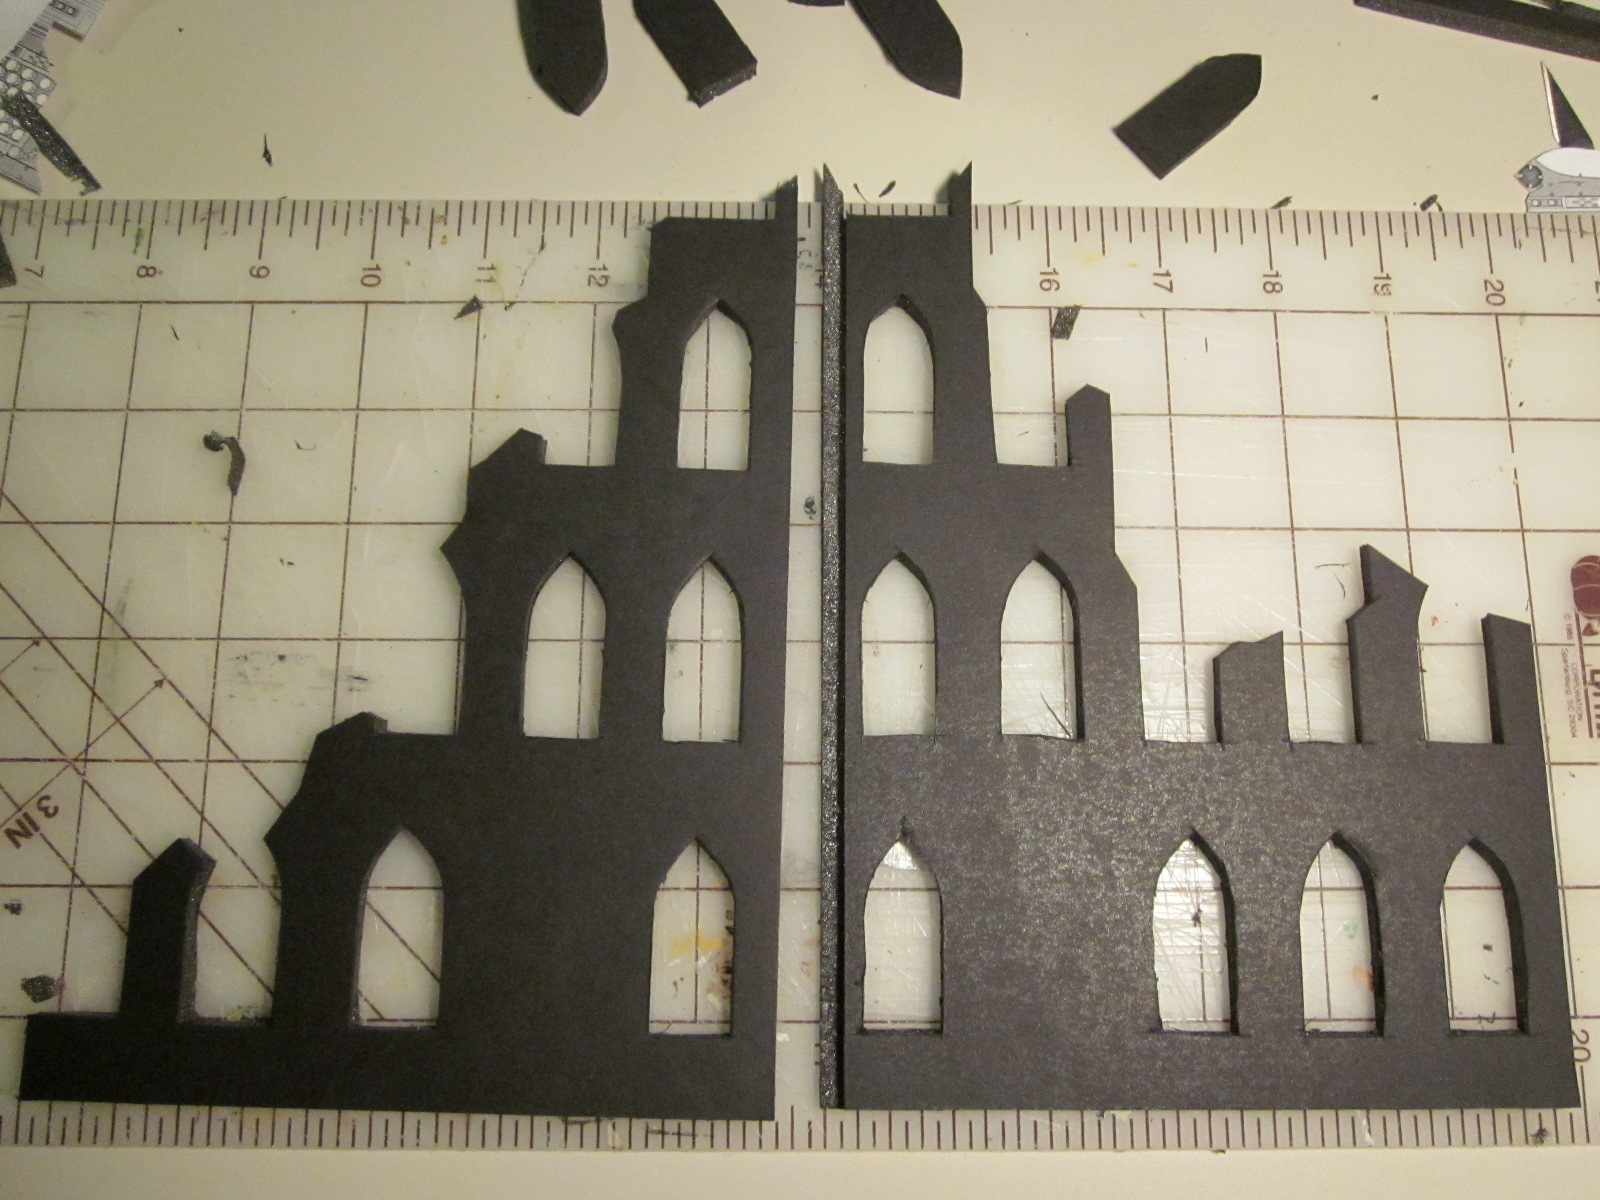
We started with a basic pattern for the corner of our building. Using peaks on the windows fits in with the Warhammer 40k world better than squares. The same goes for peaks on the top. You can break off the wall at any height or width you prefer. Ours is 3 stories tall at the highest and five windows wide

Building Warhammer 40k Ruins
These will be ruins so don't worry to much if your cuts aren't precise. We are using foam-core this time for ease of cutting. This is our rear corner, only one story left back there.

Building Warhammer 40k Ruins
For the cuts on the edges, these are walls that have been "blown up" so don't worry if you need to tear things off. The rougher the cuts look the better the paint job will look.

Building Warhammer 40k Ruins
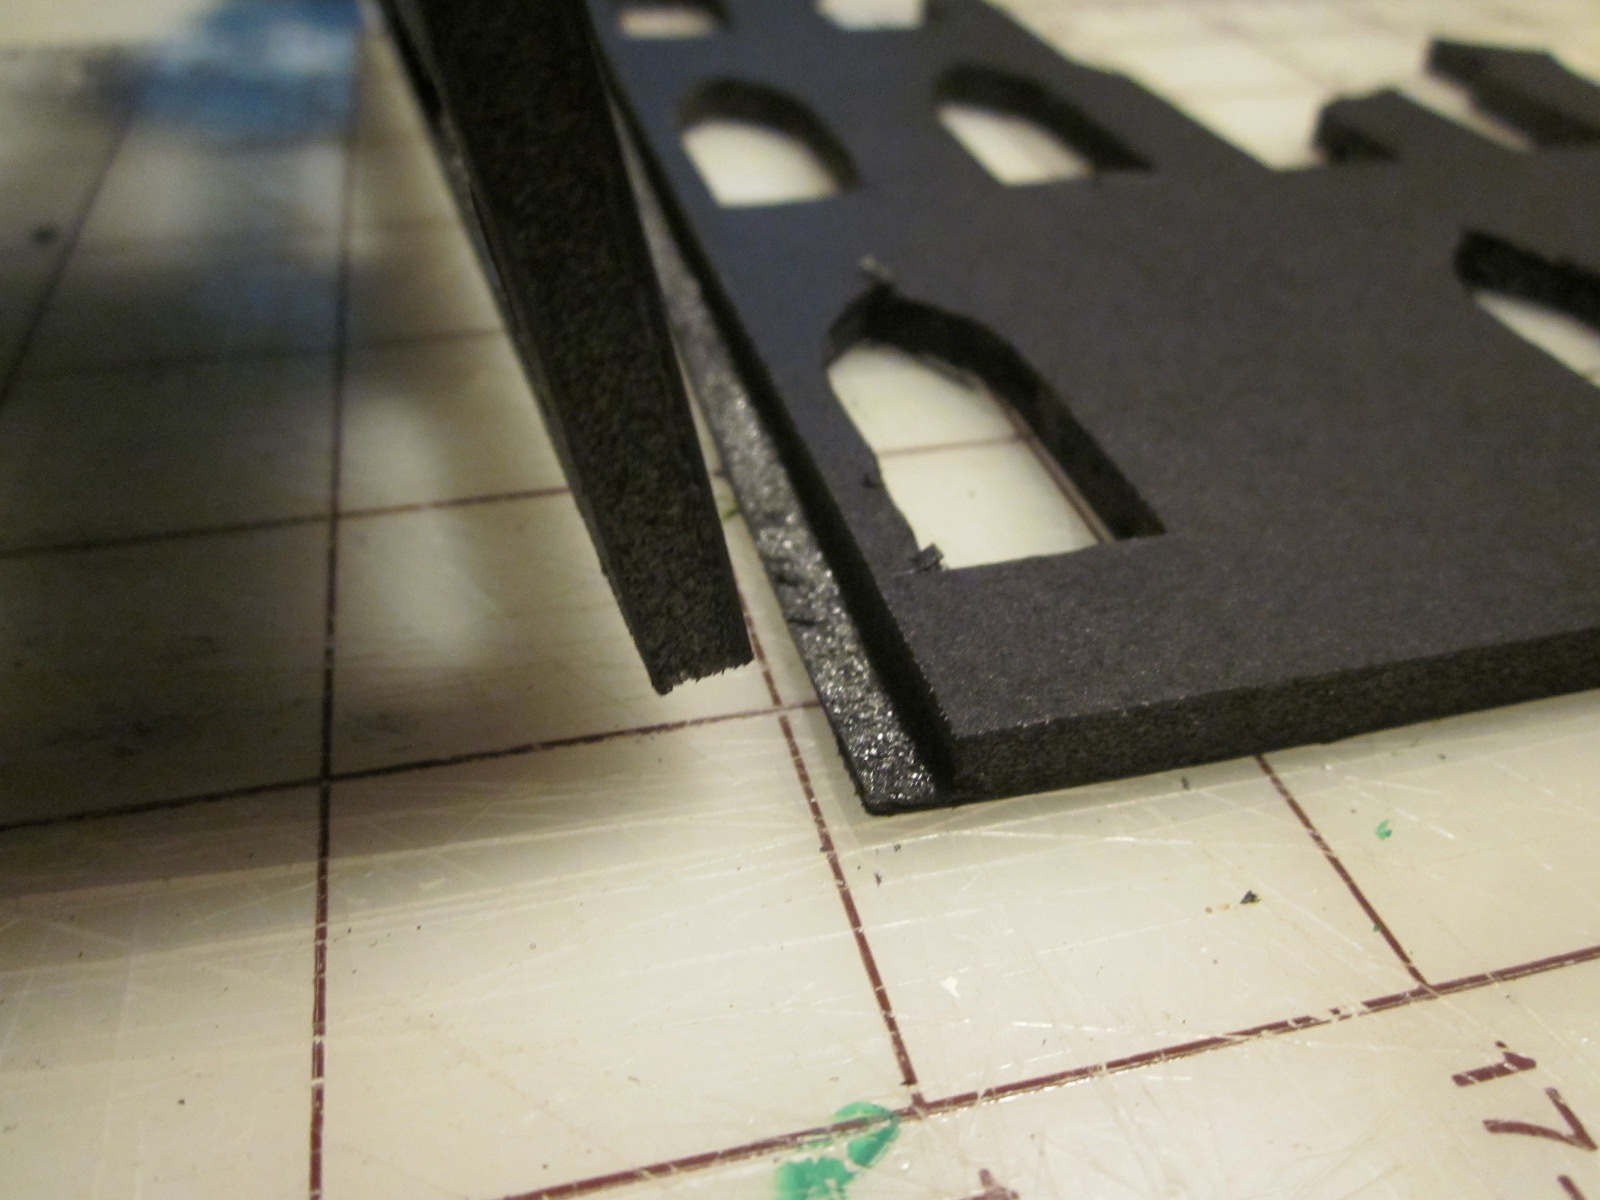
For corners, trim off the thickness of the foam-core from the facing and the foam. Be careful not to cut through the backing. Apply a bead of hot glue down the corner and press the two parts together. You can use pva or craft glue but you'll need to leave the pieces to dry before proceeding. The hot glue dries solid, quick and a good way to keep your project rolling.

Building Warhammer 40k Ruins
Next get hold of some press board, we used a cereal box. Cut strips the height of your structure and about 1/4 inch wide.

Building Warhammer 40k Ruins
Glue those strips vertically between the windows. We cut door frames too and placed them in the gaps where we left windows out. We cut a 12 inch square piece of MDF board for our base.

Building Warhammer 40k Ruins
We took leftover pieces of foam-core and insulation foam broke them up and used them for rubble. We added some of the sprue sticks we made in the last "How-To". Use hot glue for the large chunks.

Building Warhammer 40k Ruins
We added piles of coarse ballast and "bits" we also made in the last tutorial. For these we used regular pva or craft glue. Spread as much or little as needed to secure the piles.

Building Warhammer 40k Ruins
Here's what we have so far. Good pile of rubble where the floors would have collapsed into.

Building Warhammer 40k Ruins
From the air it looks like so.

Now onto the painting. We had some latex paint with sand and ballast already mixed in but wanted to add more for the rubble.

Building Warhammer 40k Ruins
Using a large brush, start applying it liberally in all areas.

Building Warhammer 40k Ruins
Coat the fronts of your buildings too. Use vertical strokes so when you do the final painting steps it'll look great.

Building Warhammer 40k Ruins
Once everything is coated and dried, we applied a coat of black primer to finally seal everything in.

Building Warhammer 40k Ruins
Next, using a 1/2 inch brush apply a heavy dry-brush of dark gray

Painting Warhammer 40k Ruins
Apply to all sides...


Then continue with a heavy dry-brush of medium gray..

Painting Warhammer 40k Ruins
Then add slate gray....

Painting Warhammer 40k Ruins
When doing the buildings, use vertical strokes from the top down and especially under the windows.

Painting Warhammer 40k Ruins
This is where the weathering affects add to your terrain piece

Painting Warhammer 40k Ruins
We added a coat a light gray dry brush over most of the structure and then a light dry-brush of warm white over the very tops of debris and where weathering would be the heaviest like near the top of the building.

Painting Warhammer 40k Ruins
Here's the final dry-brush coat applied.

Painting Warhammer 40k Ruins
The rubble details come out with the final bright touches of warm white.

We feel it's lookin good from the back.

Painting Warhammer 40k Ruins
For the final touches we added splashes of Burnt Umber wash where any mud might be along the base.

Painting Warhammer 40k Ruins
So here it is. A beautiful piece of terrain to go along with your statue, courtyard and barricades.

Now you can use it as an ideal spot for your Tau Pathfinders..
Somewhere where a lone Blood Angels Sergeant  can hold out against a horde of greenskins

With the new allied rules you can have a last remnant of a Space Marine squad and Dreadnought  join up with a few Tau Pathfinders and Stealth team.

So now go have a great battle!
The Old Crow

Friday, June 29, 2012

Warhammer 40K Terrain How To - Part One - Courtyard and Statue Ruins

OK, in view of the new Warhammer 40k 6th Edition Rule Book being released we're going to start a series on building terrain for Warhammer 40k. We're going for the war torn city fighting feel in this series.

Sketch of Warhammer 40k Terrain Project
Today we'll show you how a little ingenuity and patience can help you build a great terrain piece for the center of your war game table. This is going to be a monument with a statue and courtyard of types.

This could be for Warhammer or Warhammer 40k. You can use this same technique for historical wargames as long as you can find the right "statue". You'll need an action figure or two, a lid from a spray can or similar substance, some foam sheeting and a piece of hardboard. Here is a sketch of what we wanted to build.

Parts for Warhammer 40k Terrain Project
Watching the price drop over the last few months on the Green Lantern and Thor action figures finally paid off. I scored two of these multi-figure packs for $1.50 each in the clearance aisle at Walmart. The yellow lid is from a can of spray foam insulation. There are no markings on it, so nothing to file down.
Other good sources for action figures would be garage sales and flea markets.

Part for Warhammer 40k Terrain Project
We started with cutting off the one arm and using a pin drill to add holes on the figure. Using a craft knife (careful, they're sharp) add chips around the holes edges. Bullet holes on stone are not nice round circles. We also used some thicker adhesive to fill in the joints.

Once your carving is completed, prime the action figure black. We typically use Rustoleum Automotive Primer for metal and plastic models. It's only around $3-4.00 USD a can and has a fine spray so doesn't fill in details.


Finished Painted Statue for Warhammer 40k Terrain Project
We then drybrushed a dark gray, medium gray and light gray onto the figure. Use an off white to highlight edges and chipped areas near bullet holes.

Now that he was painted we took the lid from our can of spray foam insulation. There are no markings on the lid, so nothing to file down. We used the same technique to paint the lid to match.

Building Statue for Warhammer 40k Terrain Project
Once painted we drilled holes in the bottom of the "statues" feet and matching holes in the lid.

Building Statue for Warhammer 40k Terrain Project
Using small screws leftover from some household repair, we secured the statue to the pedestal.
Finished Statue for Warhammer 40k Terrain Project
Here's the completed statue!

Base for Warhammer 40k Terrain Project
Now we need someplace to put him. A friend was throwing out a couple old frames when I noticed the hardboard backing. I quickly "recycled" them to the workshop and cut a 12" square for a base. Using pieces of one inch thick leftover insulation board I had to cut two 4" x 8" pieces to get the 8" square I wanted. I placed the pre-painted base on the center to make sure it was a good fit.

Cutting Base for Warhammer 40k Terrain Project
Now the steps. Measure an inch all around the foam and 1/2 inch down. Carefully cut vertically on the short edge...

Cutting Base for Warhammer 40k Terrain Project
then cut down around your one inch line from the top.

Cutting Base for Warhammer 40k Terrain Project
This should allow you to remove half the height one inch all around leaving a nice step. Next you'll want to notch one inch marks across two sides and draw squares for the stones. Press in with a pen or pencil to leave indentations. Don't forget to do the vertical parts of the steps too.


Here's the base after all the lines are drawn on.

Now to distress the base to look battle worn


Adding battle damage to base for Warhammer 40k Terrain Project
As you can see, we took quite a few chunks out of the foam board. Don't be afraid to remove large chunks if you want to!

Adding battle damage to base for Warhammer 40k Terrain Project
Now we add debris. Using any craft glue and chunks of foam, plastic or gravel. Here we used clippings of old sprues...

Adding battle damage to base for Warhammer 40k Terrain Project
...pieces of foam and coarse ballast are randomly placed around the base.

You'll notice we cut a circular groove for the base of the statue to fit into the top of the platform.

Painting Base for Warhammer 40k Terrain Project
Now to paint the creation. I've mentioned in the past, always be on the lookout for bad mixes in the paint department of your local hardware store. We found a gallon of gray for 3.00 US.

Using some of the coarse ballast and sand we mixed it with the paint in a small container to give it some texture.

Painting Base for Warhammer 40k Terrain Project
Painting over all the debris seals it in place and will help preserve your terrain piece for many gaming sessions.

Painting the base for Warhammer 40k Terrain Project
Let the paint dry thoroughly before the next step.

Painting the base for Warhammer 40k Terrain Project
Shading and highlighting are essentials to painting your terrain.

Here we used a black wash to fill in all the recesses. You could prime the whole thing in black too, especially if the paint you found was some shade of green or red. Either way, wait until it drys before moving onto highlighting.

Painting the base for Warhammer 40k Terrain Project
Using a larger flat brush and minimal paint, lightly stroke the brush across the texture. Once again, we used successive layers of medium gray, slate gray and then light gray.

Painting the base for Warhammer 40k Terrain Project
Some areas were given a light dry brush of off-white.

Finished Warhammer 40k Terrain Project
There you have it, a great centerpiece or objective for your Space Marines to take or defend.

Finished Warhammer 40k Terrain Project
Next we'll look at recycling other parts you have laying around and building barricades!

Have a Great Battle!
The Old Crow