Today we'll show you how a little ingenuity and patience can help you build a great terrain piece for the center of your war game table. This is going to be a monument with a statue and courtyard of types.
This could be for Warhammer or Warhammer 40k. You can use this same technique for historical wargames as long as you can find the right "statue". You'll need an action figure or two, a lid from a spray can or similar substance, some foam sheeting and a piece of hardboard. Here is a sketch of what we wanted to build.
Watching the price drop over the last few months on the Green Lantern and Thor action figures finally paid off. I scored two of these multi-figure packs for $1.50 each in the clearance aisle at Walmart. The yellow lid is from a can of spray foam insulation. There are no markings on it, so nothing to file down.
Other good sources for action figures would be garage sales and flea markets.
Once your carving is completed, prime the action figure black. We typically use Rustoleum Automotive Primer for metal and plastic models. It's only around $3-4.00 USD a can and has a fine spray so doesn't fill in details.
We then drybrushed a dark gray, medium gray and light gray onto the figure. Use an off white to highlight edges and chipped areas near bullet holes.
Now that he was painted we took the lid from our can of spray foam insulation. There are no markings on the lid, so nothing to file down. We used the same technique to paint the lid to match.
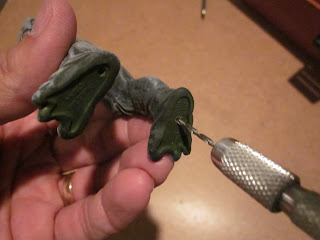
Once painted we drilled holes in the bottom of the "statues" feet and matching holes in the lid.
Using small screws leftover from some household repair, we secured the statue to the pedestal.
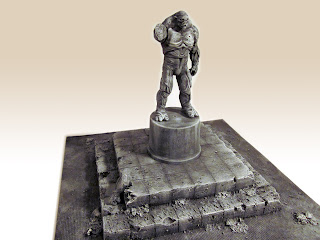
Here's the completed statue!
Now we need someplace to put him. A friend was throwing out a couple old frames when I noticed the hardboard backing. I quickly "recycled" them to the workshop and cut a 12" square for a base. Using pieces of one inch thick leftover insulation board I had to cut two 4" x 8" pieces to get the 8" square I wanted. I placed the pre-painted base on the center to make sure it was a good fit.
Now the steps. Measure an inch all around the foam and 1/2 inch down. Carefully cut vertically on the short edge...
then cut down around your one inch line from the top.
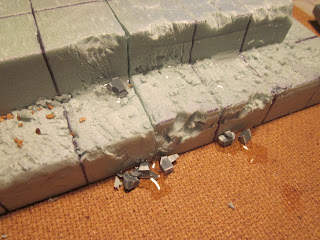
Now to distress the base to look battle worn
As you can see, we took quite a few chunks out of the foam board. Don't be afraid to remove large chunks if you want to!
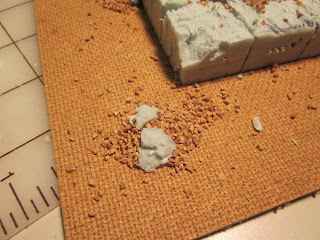
Now we add debris. Using any craft glue and chunks of foam, plastic or gravel. Here we used clippings of old sprues...
...pieces of foam and coarse ballast are randomly placed around the base.
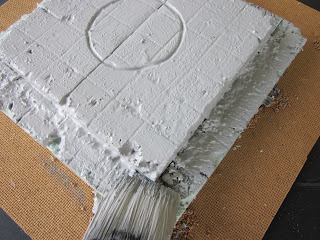
You'll notice we cut a circular groove for the base of the statue to fit into the top of the platform.
Now to paint the creation. I've mentioned in the past, always be on the lookout for bad mixes in the paint department of your local hardware store. We found a gallon of gray for 3.00 US.
Using some of the coarse ballast and sand we mixed it with the paint in a small container to give it some texture.
Painting over all the debris seals it in place and will help preserve your terrain piece for many gaming sessions.
Shading and highlighting are essentials to painting your terrain.
Here we used a black wash to fill in all the recesses. You could prime the whole thing in black too, especially if the paint you found was some shade of green or red. Either way, wait until it drys before moving onto highlighting.
Using a larger flat brush and minimal paint, lightly stroke the brush across the texture. Once again, we used successive layers of medium gray, slate gray and then light gray.
Some areas were given a light dry brush of off-white.
There you have it, a great centerpiece or objective for your Space Marines to take or defend.
Next we'll look at recycling other parts you have laying around and building barricades!
Have a Great Battle!
The Old Crow








Very nice. I'm not sure if I like the texture on the hardboard, but the rest is great. I'll need to find a good action figure to use. (Way better than spending $30 for the GW statue). Thanks for the post!
ReplyDeleteJust wow. Some obvious (but overlooked) techniques and a lot of not so obvious. Thank you!
ReplyDelete