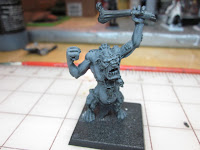
Welcome, today we’re going to move back to the realm of fantasy miniature wargames and paint a Warhammer Stone Troll.
Here he is in all his glory. Let's run through the step by step process of painting this beast.
We started as usual by priming the model in black.
Here he is in all his glory. Let's run through the step by step process of painting this beast.
We started as usual by priming the model in black.
The next 3 steps are successive coats of dark gray, medium gray and finally barn wood.
After its set for a few minutes, we added a dry-brush coat of country grey to pull out all of the details.
The stone troll model also has a great deal of detail on his back. Here it is with the highlights.
Next we added a wash of olive green to simulate mosses growing in the crevices of the stones.
Making sure the olive has dried and we dry-brushed warm white on selected areas of bumps and stones. This adds some additional warm tones to the otherwise cool tones on the troll.
Now back to the front and starting on the details. We used clay bisque to base the skulls and trolls teeth. Next a highlight of titanium white was added to those same items.
We based the ropes, hair and cloth with burnt umber and the chain mail with metallic gun metal.
A highlight of light aluminum was applied to the chain mail bringing out the links nicely. Then apply a wash of red oxide to simulate rust on parts of the trolls chain mail. Be careful not to overdo it.
We based the ropes, hair and cloth with burnt umber and the chain mail with metallic gun metal.
A highlight of light aluminum was applied to the chain mail bringing out the links nicely. Then apply a wash of red oxide to simulate rust on parts of the trolls chain mail. Be careful not to overdo it.
Onto other details, we used antique gold on the rings, a dry-brush of linen on the ropes, mushroom dry-brush on the cloth and sand on the belly button bone to set it off from the surrounding cool tones.
The dwarf trophy head received coats of red oxide and a light dry-brush of pure orange to the hair. For the skin tone we used mushroom, linen and a final light wash of olive in so it looks like its been hanging there for a while. A slight wash of heritage red in the trolls wound makes it appear irritated and in the process of regenerating.
The club was painted with mushroom, clay bisque and a wash of heritage red was added into the recesses. After drying a dry-brush of warm white finished it off.
Now onto the bases! I typically mark the base with where the model attaches to keep the area clear of sand, ballast or rock. Here we have added the chunky rocks and gravel. The chunky material is “Lizard Litter” made from crushed walnut shells. The smaller gravel is Woodland Scenics medium ballast. Skeleton bits and a small aquarium rock were added for detail.
REMEMBER SAFETY! Halogen lights get really hot and if the adjustable lamp you are using slips lower while your bases are drying it can have disastrous results. Thankfully a plastic model was not attached to the base.
After it thoroughly dries, under your halogen light, dry-brush on medium gray and finally country gray.
Final touches of brown and green flock with a few bits of ballast mixed in were added. Make sure to randomize the patches in size and spacing.
Repeat all the steps above and you’ll have two lovely Warhammer stone trolls ready to add to your orc and goblin horde! With the eighth edition rules these guys now benefit from an added stomp attack making them tougher than ever.
Have a great battle,
The Old Crow


