Our special guest this post is Josh who built this incredible Wings of Redemption angel diorama. We've featured a few of Josh's paint jobs in the past, like the Apache Indian Chief, Space Marine Dreadnought and the infamous pirate Diamond Joe.
Josh started this diorama with an imagination and a 54mm model from Andrea Miniatures. The model was in six parts, the head, torso with 1 leg and arm, an arm, a leg and 2 wings.
He a assembled the main figure and used white modelling putty to fill in gaps between the joints.
The wings were left off to more easily paint the figure.
Priming the figure in white provided a brighter base for the colors.
Wings were painted with various shades of gray to keep them neutral and a dark wash was applied. Once the wings dried, a highlight of titanium white was dry-brushed onto the edges. The accents were painted with three shades of metallic golds.
The figure was temporarily affixed to a plastic base for ease of painting and the flesh colors were added.
Here the base flesh and darker wash have been applied.
After the flesh was finished, base colors for the armor, cloth and sword were painted. The hair has also been completed in this shot.
The swords accents were painted with antique gold.
The final flesh shading was then completed and the highlights and shading are being applied to the armor and cloth
Now onto nitty gritty! The gems hanging from the angels belt were detailed with highlights and that little extra glow added.
The shoulder pads had the Lion of Judah painstakingly painted.
Josh was using a 10/0 brush for his detail work.
Joshua hard at work adding additional details to the chest clasp.
An accent stripe was painted along the bottom of the angels robe and for a final touch, a swirled pattern was added to his garment.
Here's a well lit shot of the finished angel.
And one more for a nice close look.
Now onto the base of the diorama. The columns were taken from a wedding cake decoration kit and will be cut for the base.
There will be three columns of various height on the base. Their bottoms are cut at angles so they can lean in different directions.
The columns are hollow so they needed to be covered Josh stuck a round base into the top and added some drywall filler.
The base for the angel was affixed to the tallest column.
Josh wanted the columns to be marble so studied the patterns and did a beautiful job of mimicking the texture onto his columns. Here's one weathered before the marble texture and one after.
The base was a big step, Josh started with a round wooden plaque for the platform and a circle of polystyrene foam. The wood was stained with a dark walnut.
He then sculpted details in polystyrene foam with a utility knife and sanded off the roughest edges.
The main column was affixed by drilling a hole through the base, inserting a wooden dowel and then hot gluing the column into place through the foam base. Here the base has some rocks and grit glued on before painting.
Once dry, a dark brown base coat was painted...
and various coats of lighter colors were dry-brushed on.
Next was to form the antagonist in the diorama. The interior of the "pit" was painted with a fiery glow and arms were selected from an action figure, cut to the proper angles and primed black.
Details were painted onto the arms and they were hot-glued in place. Josh painted the under portion of the hands and columns to show the light source coming from the pit.
And there you have it! A prize winning diorama if we ever saw one. Keep an eye on this kid!
Have a Great Battle,
The Old Crow
Saturday, March 30, 2013
Sunday, March 24, 2013
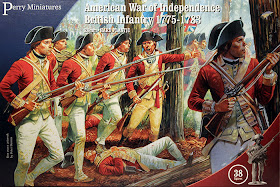
Perry Miniatures American War of Independence British Infantry - New Release
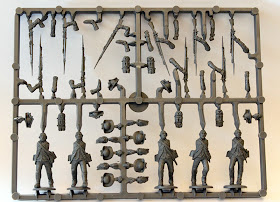
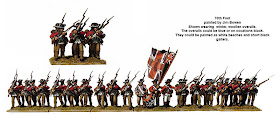
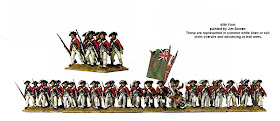
These Sweet British Infantry from 1775-1783 are the first in the American War of Independence plastic series from Perry Miniatures. They will be producing American militia and Continentals box sets too.
This box contains center company men (or hat men) of a typical British regiment for the war. The regiments flank companies were normally detached to for combined light and grenadier battalions. They are represented in cut-down coats for campaign and come with three hat variants; the typical cocked hat, the uncocked hat or board brimmed hat and the ‘Saratoga cap’, cut down from the cocked hat.
They can be assembled either at the charge or at the trail which is probably the most common drill position when operating in wooded countryside. The also wear the typical gaiter-trousers or American
trousers which became very popular in the war.
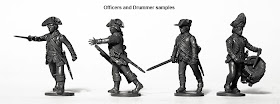
The officers are in simple undress coats favored on campaign. As always, the Perry brothers never fail to deliver.
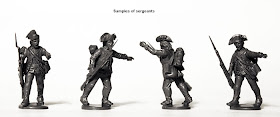
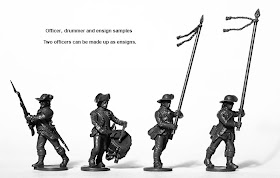
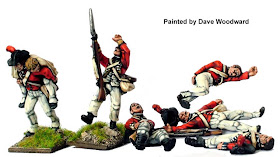
The command sprue, as you can see, allows for a variety of equipment configurations. It also contains two British casualties.
The Infantry sprue seen here contains all the variants mentioned above. The three hat variations are all moulded separate from the heads. With some careful trimming, you can wind up with a plethora of leftover rifles.
The AW 200 box contains: 36 figures plus 2 casualties, units bases, full painting guide and flags. Now we just need to wait for the American Militia and Continentals!
While your waiting, pick up some additional British casualties!
Have A Great Battle
The Old Crow
Sunday, March 17, 2013
How To Build Tents for a Historical or Warhammer Siege Encampment
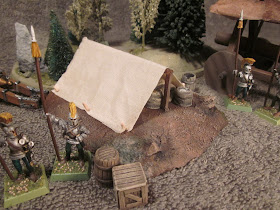
Today we'll show you How to build tents for your besiegers encampment. You can't have soldiers and supplies standing about in the rain, so lets make them somewhere to stow their gear and have a respite.
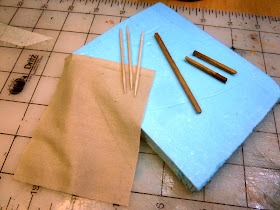
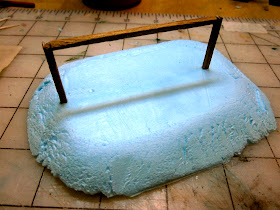
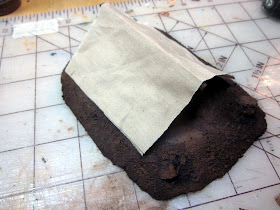
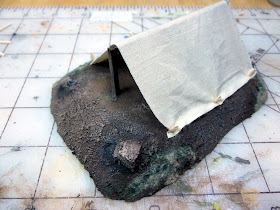
To start you'll need a base, we used some 12 inch foam to carve our hill. You'll also need a piece of fabric, something natural looking, three round toothpicks and a stick you can cut down. We cut a 3" and two 1.25" segments.
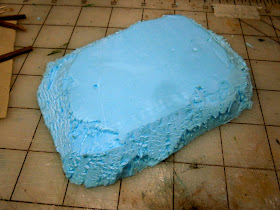
Next we carved the hill into a rough shape that would hold a tent 3 inches long.
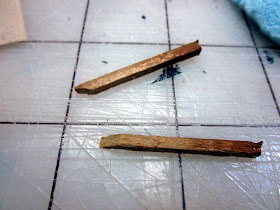
We then notched a point at the ends of our short sticks for the uprights.
After sanding the roughness off the hill, we measured the length of our support and placed the uprights into the foam. Once positioned we removed them, filled the hole with some glue and stuck them back in. Before it dried we glued the crossbar in place and pressed it together.
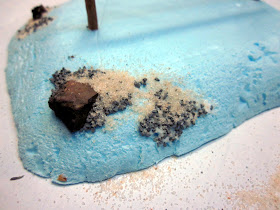
We added some areas of glue and attached small rocks and a mix of sand and medium ballast.
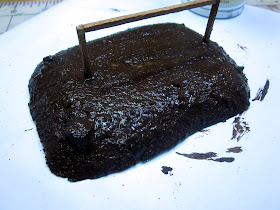
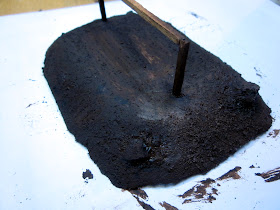
After it was set we painted the entire surface dark brown with sand in the paint for extra texture.
When it dries, you can dry-brush on some layers of lighter browns and greens if you want a grassy knoll.
Next make sure your material is the same length as your support, ours is 3", and trim the cloth to roughly a square. Fold it in half and crease it if you can. This will lie across the support.
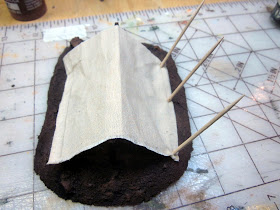
Take your round toothpicks and insert them into one of the sides at the corners and then the center.
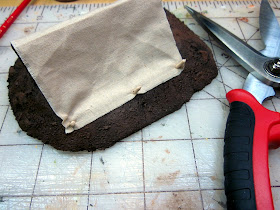
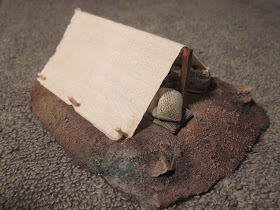
Clip off the extra length, leaving tent pegs behind.
Using the pieces clipped off, repeat these steps on the other side. Be sure to keep the material tight.
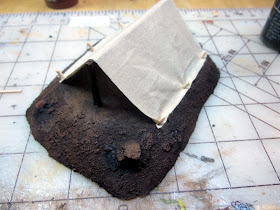
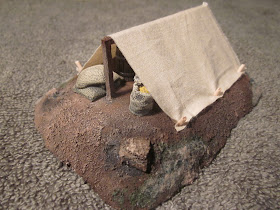
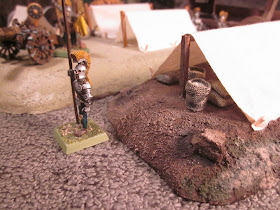
We added a few tufts of static grass for texture. and filled the supply tent with crates, barrels and sacks.
And that's how to build tents for your besiegers.
This one wound up being a siege supply tent.
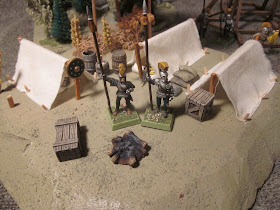
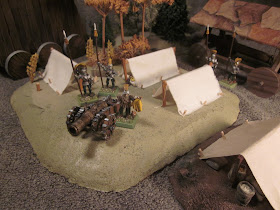
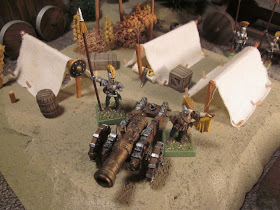
Add more tents to a larger base for making bigger terrain pieces with additional scenery bits like trees and shrubs. We even have stumps from felled trees in this piece plus a campfire. The trebuchet is set up beside the camp for easier access to fire.
We'll leave you with a few additional photos and wish you a great battle!
The Old Crow


