We had a good day painting these Viking Hirdmen from Gripping Beast Plastics. These guys will be an additional point of Warriors for a SAGA Viking warband.
The shields were primed later so they still need finished but we wanted to share these guys with you for now!
Lot's of great poses and accessories available from the box set we reviewed early last month.
Have a Great Battle,
The Old Crow
Monday, July 30, 2012
Saturday, July 28, 2012
How to Build a Bunker for Warhammer 40k Terrain
Here we are back in Warhammer 40k land and we're going to show you how to build a bunker. We were debating the finer points of Warhammer 40k defenses like the Aegis line, Fortress of Redemption and the Bastion. Considering the point costs, a bastion isn't a bad deal. Then we considered other terrain and what they could be used as. One result was using a bunker, about the same as a Bastion, in your defensive line. So here it is, now lets build it.
First we raided the parts bin, box and containers for leftover debris. Some foam pieces for our hill, board for the base, core from a roll of painters tape, an old speaker and we scored a canon from some old toy in the bottom of a parts box.
The speaker will be the top of our bunker and the canon will be our icing on the cake. You can use any other object that looks like it would work, use your imagination!
We cut a rough shape that is approximately 12 inches in diameter and started shaping our hill from the thicker foam pieces.
Knowing we wanted a little extra height on the bunker we added the blue foam and cut a circle out for the tape core.
Shaping of the surrounding hill and bunker continued and the top was tried on for size.
We pressed down on the speaker to leave an impression and cut a groove so it will sit flush when finished.
As everything took shape we realized we wanted some extra slope to make it more gradual, so we added extra chunks of foam along the base. Don't worry about gaps, we'll take care of that later.
The area for the back door was cut out too.
We used Tacky Glue, but you can use any craft or foam glue to put it together. We added a few coarse drywall screws to give it extra support. Don't over tighten the screws, they strip out easily!
We used a putty knife and drywall joint compound to fill in the gaps in the foam and at the base.
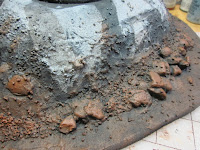
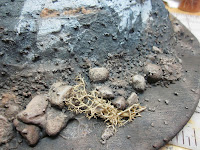
While it's still wet, press some small rocks into the thicker areas.
We added coarse ballast for additional texture. Then, using your fingers, gently tap on the wet compound. This will add ripples, help mix in the ballast and prevent the structure from looking smooth.
Here's how it should look when done adding the texture.
Next was to make sure our figures could see out of the viewing windows. The floor was to low so using the chunks we had cut out earlier we brought it up to their eye level.
Allow the joint compound time to dry, preferably overnight. Then take any latex paint and cover the model. We are using the same gray mixture we used in building the courtyard and statue and building ruins with sand and some ballast mixed in.
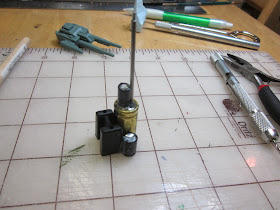
Now as the whole lot dries, onto accessories. Using a variety of old capacitors and pieces we "recycled" from old computer components, we built a communications array.
Next was the back door. We cut two press-board squares out for the door, one for the base the second for the reinforcements. The plan was just to use the piece on the left but we changed the plan to add the X onto the door.
So it will look like this.
We then glued the door in and stuck the communications array in place.
The next step was adding the canon. You can use leftover Warhammer 40 k turrets or dig around for one of the kids old Star Wars toys. We had a larger gun but it was to big for the bunker. We'll use it for a future project. Anyway, we drilled a whole to the size of the guns base so it will turn when completed.
We again used old recycled capacitors to add on the ends of our canon. Use a pin-drill to make holes in both the capacitor and barrel. Insert a metal pin, paperclips work great for this too.
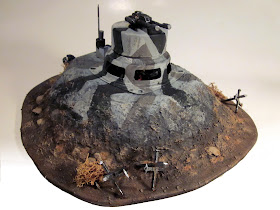
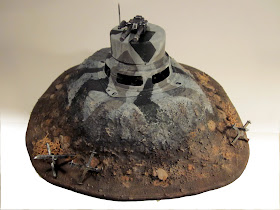
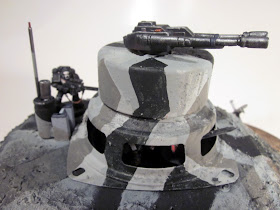
We sprayed the bottom half of the bunker, all accessories and the interior with black primer. Then we sketched a camouflage pattern onto the top and using a medium and dark gray added the pattern.
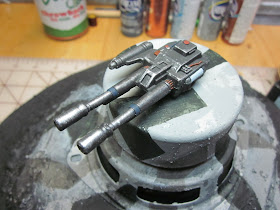
 Onto accessories. The entire canon and parts of the array were lightly painted with Metallic Gunmetal Gray and then dry-brushed with Aluminum.
A bit of copper and a few touches of color brought the gun to life. We also used additional spots of Aluminum on the corners and edges to show wear and tear.
With the communications array in place we painted the camouflage pattern onto it. We also added a touch of color to the top of the antennae and other parts. This completed he upper half of the bunker!
Now we move on to the base. We began by painting on Burnt Umber around the base and up onto the hillside but not to far up onto the concrete gray.
Next we added a layer of Coffee Bean...
then a lighter reddish brown called Nutmeg...
a final coat with Territorial Beige.
For final highlights we added Barn Wood over the entire base, including the concrete areas. As you could see we did add splashes of browns on the concrete areas for dirty patches.
We used the Gunmetal Gray to base the door, then dry-brushed with Aluminum and final touches were also with Barn Wood. Don't forget to lighten up the ground outside the door to simulate a higher traffic area.
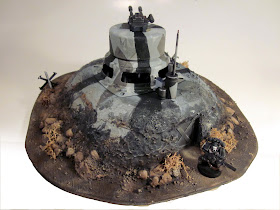
Finally we added spots of brush and brown flock to simulate dead foliage in a barren area.
Place these sparingly. Don't over do it.
We thought there might be a little extra around the back door. We hypothesized it was from days gone by when the plants grew and the owners wanted to hide the entrance.
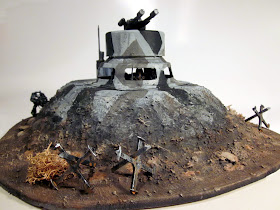
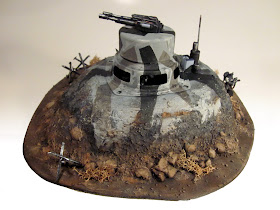
So there you have it, another great terrain piece for your Warhammer 40k battleground!
With a few modifications, this could be a great piece for WWII games like "Bolt Action" or in a different scale, 'Flames of War'.
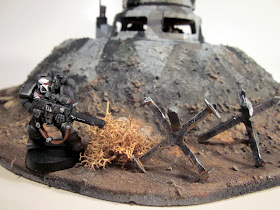
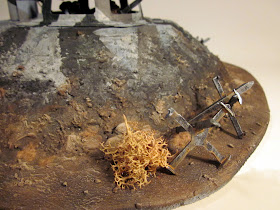
We added some tank traps for extra bling! We'll have to show you how we built them next time.
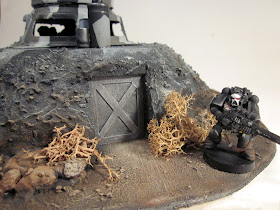
Here's a few last photos of the finished product.
Have a Great Battle!
The Old Crow
First we raided the parts bin, box and containers for leftover debris. Some foam pieces for our hill, board for the base, core from a roll of painters tape, an old speaker and we scored a canon from some old toy in the bottom of a parts box.
The speaker will be the top of our bunker and the canon will be our icing on the cake. You can use any other object that looks like it would work, use your imagination!
We cut a rough shape that is approximately 12 inches in diameter and started shaping our hill from the thicker foam pieces.
Knowing we wanted a little extra height on the bunker we added the blue foam and cut a circle out for the tape core.
Shaping of the surrounding hill and bunker continued and the top was tried on for size.
We pressed down on the speaker to leave an impression and cut a groove so it will sit flush when finished.
As everything took shape we realized we wanted some extra slope to make it more gradual, so we added extra chunks of foam along the base. Don't worry about gaps, we'll take care of that later.
The area for the back door was cut out too.
We used Tacky Glue, but you can use any craft or foam glue to put it together. We added a few coarse drywall screws to give it extra support. Don't over tighten the screws, they strip out easily!
We used a putty knife and drywall joint compound to fill in the gaps in the foam and at the base.
While it's still wet, press some small rocks into the thicker areas.
We added coarse ballast for additional texture. Then, using your fingers, gently tap on the wet compound. This will add ripples, help mix in the ballast and prevent the structure from looking smooth.
Here's how it should look when done adding the texture.
Next was to make sure our figures could see out of the viewing windows. The floor was to low so using the chunks we had cut out earlier we brought it up to their eye level.
Allow the joint compound time to dry, preferably overnight. Then take any latex paint and cover the model. We are using the same gray mixture we used in building the courtyard and statue and building ruins with sand and some ballast mixed in.
Now as the whole lot dries, onto accessories. Using a variety of old capacitors and pieces we "recycled" from old computer components, we built a communications array.
Next was the back door. We cut two press-board squares out for the door, one for the base the second for the reinforcements. The plan was just to use the piece on the left but we changed the plan to add the X onto the door.
So it will look like this.
We then glued the door in and stuck the communications array in place.
The next step was adding the canon. You can use leftover Warhammer 40 k turrets or dig around for one of the kids old Star Wars toys. We had a larger gun but it was to big for the bunker. We'll use it for a future project. Anyway, we drilled a whole to the size of the guns base so it will turn when completed.
We again used old recycled capacitors to add on the ends of our canon. Use a pin-drill to make holes in both the capacitor and barrel. Insert a metal pin, paperclips work great for this too.
We sprayed the bottom half of the bunker, all accessories and the interior with black primer. Then we sketched a camouflage pattern onto the top and using a medium and dark gray added the pattern.
 Onto accessories. The entire canon and parts of the array were lightly painted with Metallic Gunmetal Gray and then dry-brushed with Aluminum.
A bit of copper and a few touches of color brought the gun to life. We also used additional spots of Aluminum on the corners and edges to show wear and tear.
With the communications array in place we painted the camouflage pattern onto it. We also added a touch of color to the top of the antennae and other parts. This completed he upper half of the bunker!
Now we move on to the base. We began by painting on Burnt Umber around the base and up onto the hillside but not to far up onto the concrete gray.
Next we added a layer of Coffee Bean...
then a lighter reddish brown called Nutmeg...
a final coat with Territorial Beige.
For final highlights we added Barn Wood over the entire base, including the concrete areas. As you could see we did add splashes of browns on the concrete areas for dirty patches.
We used the Gunmetal Gray to base the door, then dry-brushed with Aluminum and final touches were also with Barn Wood. Don't forget to lighten up the ground outside the door to simulate a higher traffic area.
Finally we added spots of brush and brown flock to simulate dead foliage in a barren area.
Place these sparingly. Don't over do it.
We thought there might be a little extra around the back door. We hypothesized it was from days gone by when the plants grew and the owners wanted to hide the entrance.
So there you have it, another great terrain piece for your Warhammer 40k battleground!
With a few modifications, this could be a great piece for WWII games like "Bolt Action" or in a different scale, 'Flames of War'.
We added some tank traps for extra bling! We'll have to show you how we built them next time.
Here's a few last photos of the finished product.
Have a Great Battle!
The Old Crow
Wednesday, July 25, 2012
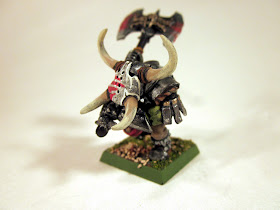
Orc Warlord and Warboss to lead your Warhammer Fantasy Orc and Goblin Army!
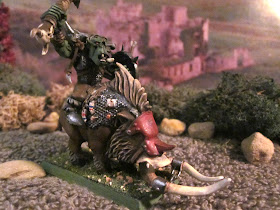
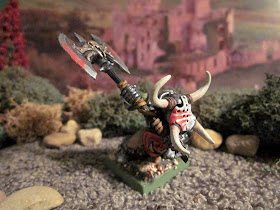
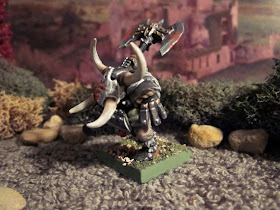
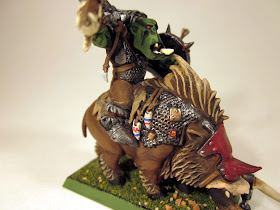
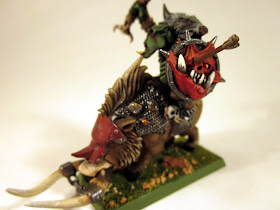
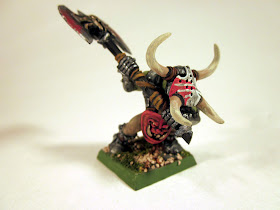
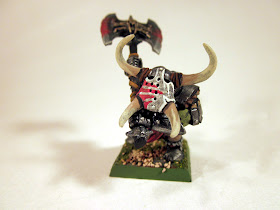
Here's Orc Warboss Bolar Rogbut on boar and his esteemed captain Snagga Pigstikka. Leaders of the Warhammer Fantasy Orc and Goblin tribe, The Brollars! OK, you can name them what you want, but this is our story and we're sticking to it!
Josh at Hendersonworks did the paint job on these fine miniatures. He's been doing a nice job when he gets around to having fun.
We decided to post a few images here and let anybody whose interested know they are both for sale on Ebay
Orc Warboss Bolar Rogbut can be found at this Ebay link
and his Captain, can be found here!
If you are an international buyer whose interested, let us know. No matter what your interest, enjoy the images!
Have a Great Battle,
The Old Crow


